
How to Backup and Restore Your Trezor Wallet – Step-by-Step Review
As a cryptocurrency investor, securing your digital assets is of utmost importance. One of the most popular hardware wallets in the market is Trezor. It offers a secure and user-friendly solution for storing and managing your cryptocurrencies. However, accidents can happen, and you might lose access to your wallet due to various reasons such as device malfunctions or theft. That’s why it’s crucial to regularly backup and restore your Trezor wallet to protect your funds from being lost forever.
Step 1: Prepare Your Backup
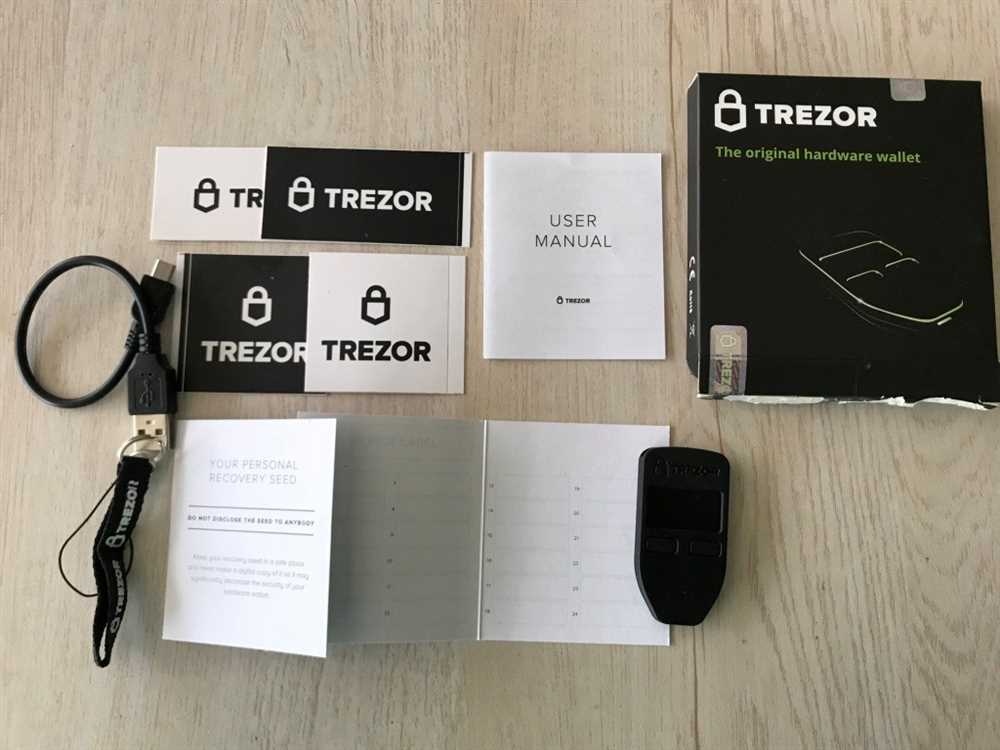
The first step in ensuring the safety of your Trezor wallet is creating a backup. Connect your Trezor device to your computer and open the official Trezor Wallet interface. Enter your PIN code and follow the instructions to access your wallet. Once you are in, navigate to the “Settings” tab and select “Device” from the dropdown menu. Click on “Backup” and carefully write down the recovery seed shown on the device screen. Make sure to write it down on a piece of paper and store it in a secure location, preferably a fireproof safe or a safety deposit box.
Step 2: Verify Your Backup
After creating your backup, it’s crucial to verify its accuracy. Navigate to the “Recovery” tab on the Trezor Wallet interface and click on “Verify recovery seed.” Follow the instructions displayed on your device screen and carefully enter each word of your recovery seed in the correct order. This step ensures that your backup is accurate, and you will be able to recover your funds if needed.
Step 3: Restoring Your Trezor Wallet
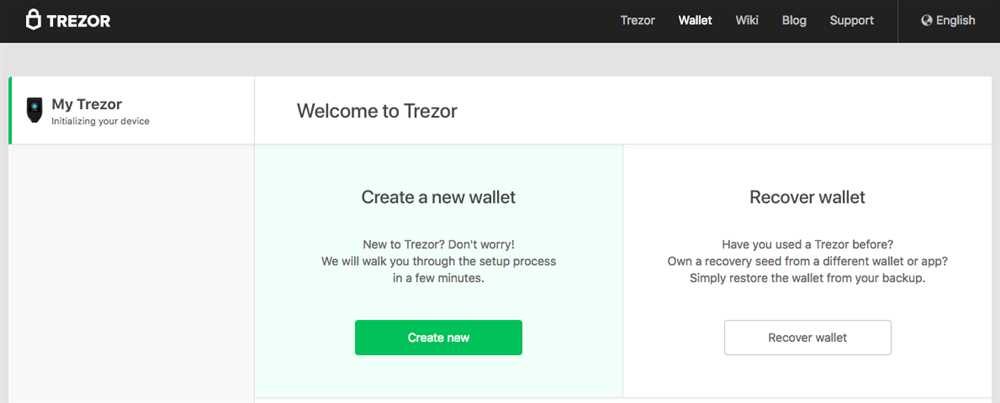
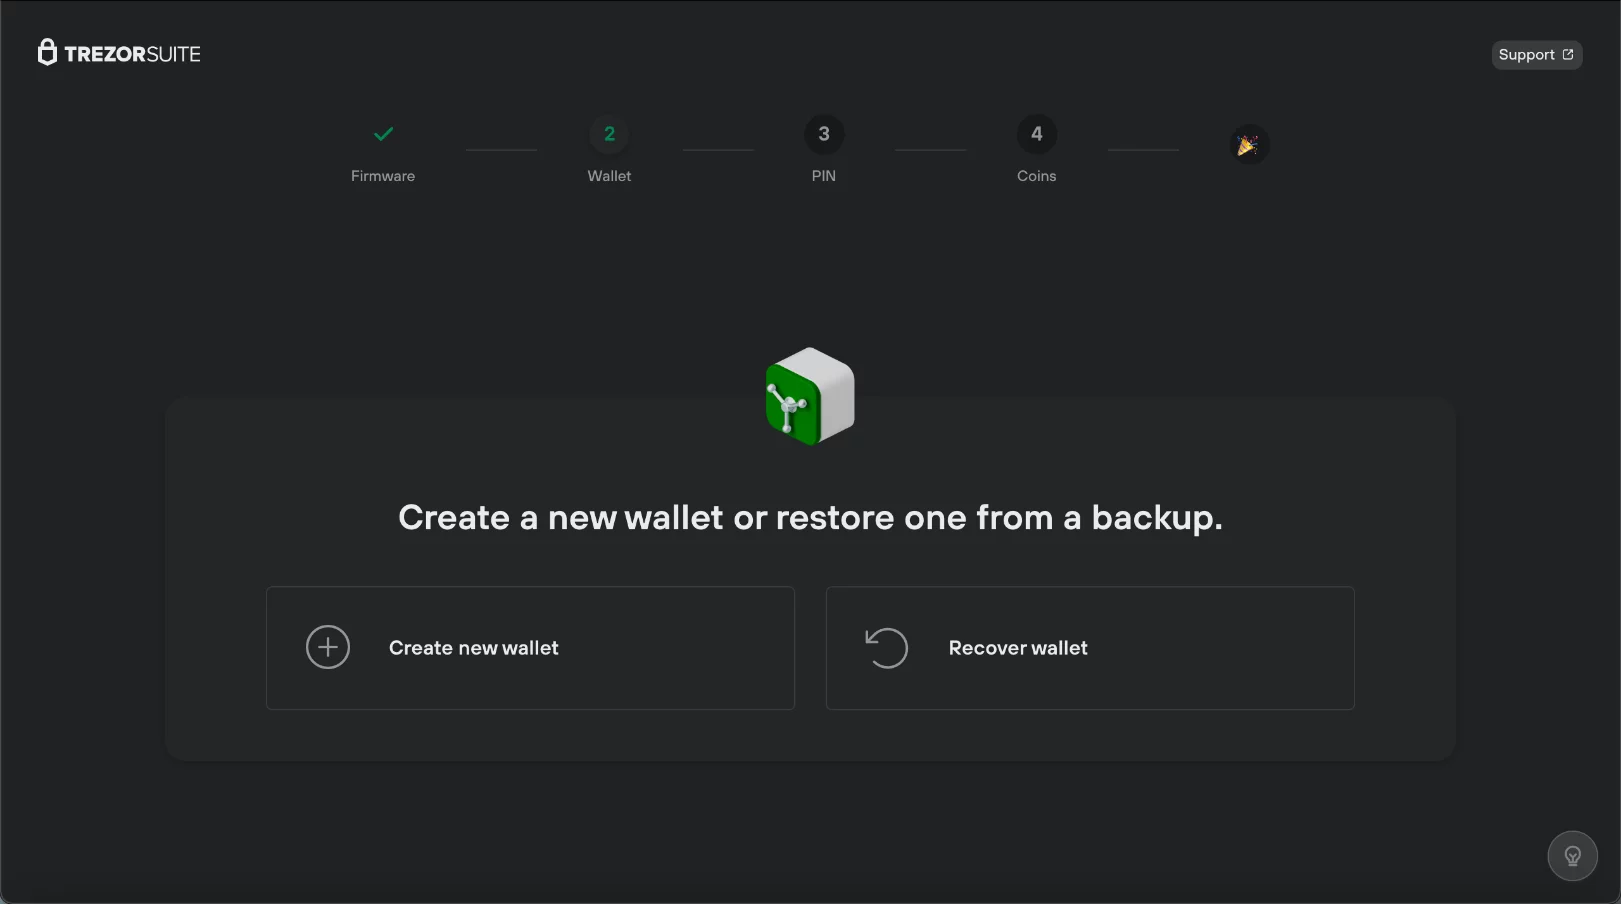
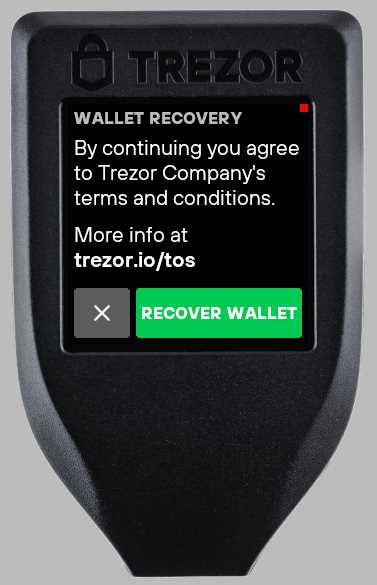
If you ever need to restore your Trezor wallet, the process is straightforward. Start by getting a new or factory-reset Trezor device. Connect it to your computer and open the Trezor Wallet interface. On the welcome screen, select “Recover wallet” and follow the instructions displayed on your screen. Enter your recovery seed word by word in the correct order. Once you have finished entering the seed, your wallet will be restored, and you will have access to your funds again.
Remember, backing up and restoring your Trezor wallet is an essential part of keeping your cryptocurrencies safe. Make sure to follow these steps carefully and store your recovery seed in a secure place. By taking these precautions, you can have peace of mind knowing that your digital assets are protected and accessible even in the event of unforeseen circumstances.
Reasons to Backup Your Trezor Wallet
Backing up your Trezor wallet is an essential step in ensuring the security of your cryptocurrency assets. Here are some reasons why you should always have a backup:
1. Protection against device loss or damage
Accidents happen, and if your Trezor hardware wallet is lost, stolen, or damaged, you may lose access to your funds. By having a backup, you can easily recover your wallet and regain access to your cryptocurrencies.
2. Shield against software failures
Software failures can occur, and it’s not uncommon for bugs or glitches to cause unpredictable behavior in crypto wallets. If your wallet becomes corrupted or inaccessible due to a software issue, having a backup will allow you to restore your wallet and continue managing your funds.
3. Protection from human errors
We are all prone to making mistakes, and accidentally deleting or overwriting important wallet information can result in the permanent loss of your funds. Creating a backup ensures that if you make a mistake, you can easily restore your wallet and recover your cryptocurrencies.
In summary, backing up your Trezor wallet is crucial for protecting your cryptocurrency assets from device loss, software failures, and human errors. By taking the time to create a backup, you can have peace of mind knowing that your funds are secure and easily recoverable.
Step-by-Step Guide on How to Backup Your Trezor Wallet
Securing your cryptocurrency assets is of utmost importance, and one of the key steps in doing so is creating a backup of your Trezor wallet. A backup ensures that even if you lose your Trezor device, you will still be able to access and recover your funds. Follow the step-by-step guide below to backup your Trezor wallet:
Step 1: Accessing the Trezor Wallet
Connect your Trezor device to your computer using the USB cable. Open the Trezor Wallet on your browser and enter your PIN to access your account.
Step 2: Navigating to the Backup Section

In the Trezor Wallet interface, go to the “Settings” tab and click on the “Device” section. Then, select “Backup” from the drop-down menu.
Step 3: Starting the Backup Process
Click on the “Start” button to begin the backup process. The Trezor device will display a series of words that you need to write down.
Step 4: Writing Down the Recovery Seed
Write down each word of the recovery seed on a piece of paper in the exact order as they appear on the device. It is crucial to write down the recovery seed accurately and keep it in a safe place.
Step 5: Verifying the Recovery Seed

After writing down the recovery seed, the device will prompt you to verify it. Randomly select words from the list displayed on the device and enter them in the correct order on the Trezor Wallet interface.
Step 6: Completing the Backup Process
Once you have successfully verified the recovery seed, your Trezor wallet backup is complete. It is recommended to store the paper with the recovery seed in a secure location, such as a safe deposit box or a fireproof safe.
Remember, the recovery seed is the only way to restore your Trezor wallet in case of loss or damage to your device. Keep it safe and never share it with anyone!
| Backup Steps | Description |
|---|---|
| Step 1 | Connect your Trezor device and access the Trezor Wallet on your browser. |
| Step 2 | Navigate to the “Settings” tab and select “Backup” from the drop-down menu. |
| Step 3 | Click on the “Start” button to begin the backup process. |
| Step 4 | Write down each word of the recovery seed in the exact order on a piece of paper. |
| Step 5 | Verify the recovery seed by entering random words in the correct order on the device. |
| Step 6 | Complete the backup process by successfully verifying the recovery seed. |
Step-by-Step Guide on How to Restore Your Trezor Wallet
Restoring your Trezor wallet is a straightforward process that ensures you retain access to your cryptocurrencies even if your device is lost or damaged. Follow these steps to restore your Trezor wallet:
Step 1: Install Trezor Bridge
Before restoring your wallet, make sure you have the Trezor Bridge installed on your computer. You can download it from the official Trezor website and follow the installation instructions.
Step 2: Connect Your Trezor Device
Connect your Trezor device to your computer using the USB cable provided. Make sure the device is securely connected and recognized by the Trezor Bridge.
Step 3: Launch the Trezor Wallet
Open your preferred web browser and go to the Trezor Wallet website. Click on “Connect Trezor” to launch the wallet interface.
Step 4: Select “Recover Wallet”
In the Trezor Wallet interface, click on the “Recover Wallet” button. This will initiate the restoration process for your Trezor wallet.
Step 5: Enter Seed Phrase
Enter the recovery seed phrase for your Trezor wallet. The seed phrase is a combination of 24 words provided during the initial setup of your wallet. Make sure to enter the words in the correct order.
Step 6: Confirm Seed Phrase
After entering the seed phrase, the Trezor Wallet will ask you to confirm the words by selecting them from a randomized list. This is a security measure to ensure you have correctly entered the seed phrase.
Step 7: Set PIN and Label
Once the seed phrase is confirmed, you will be prompted to set a new PIN for your Trezor device. Choose a secure PIN and enter it twice for confirmation. You can also add a label to your device to distinguish it if you have multiple Trezor wallets.
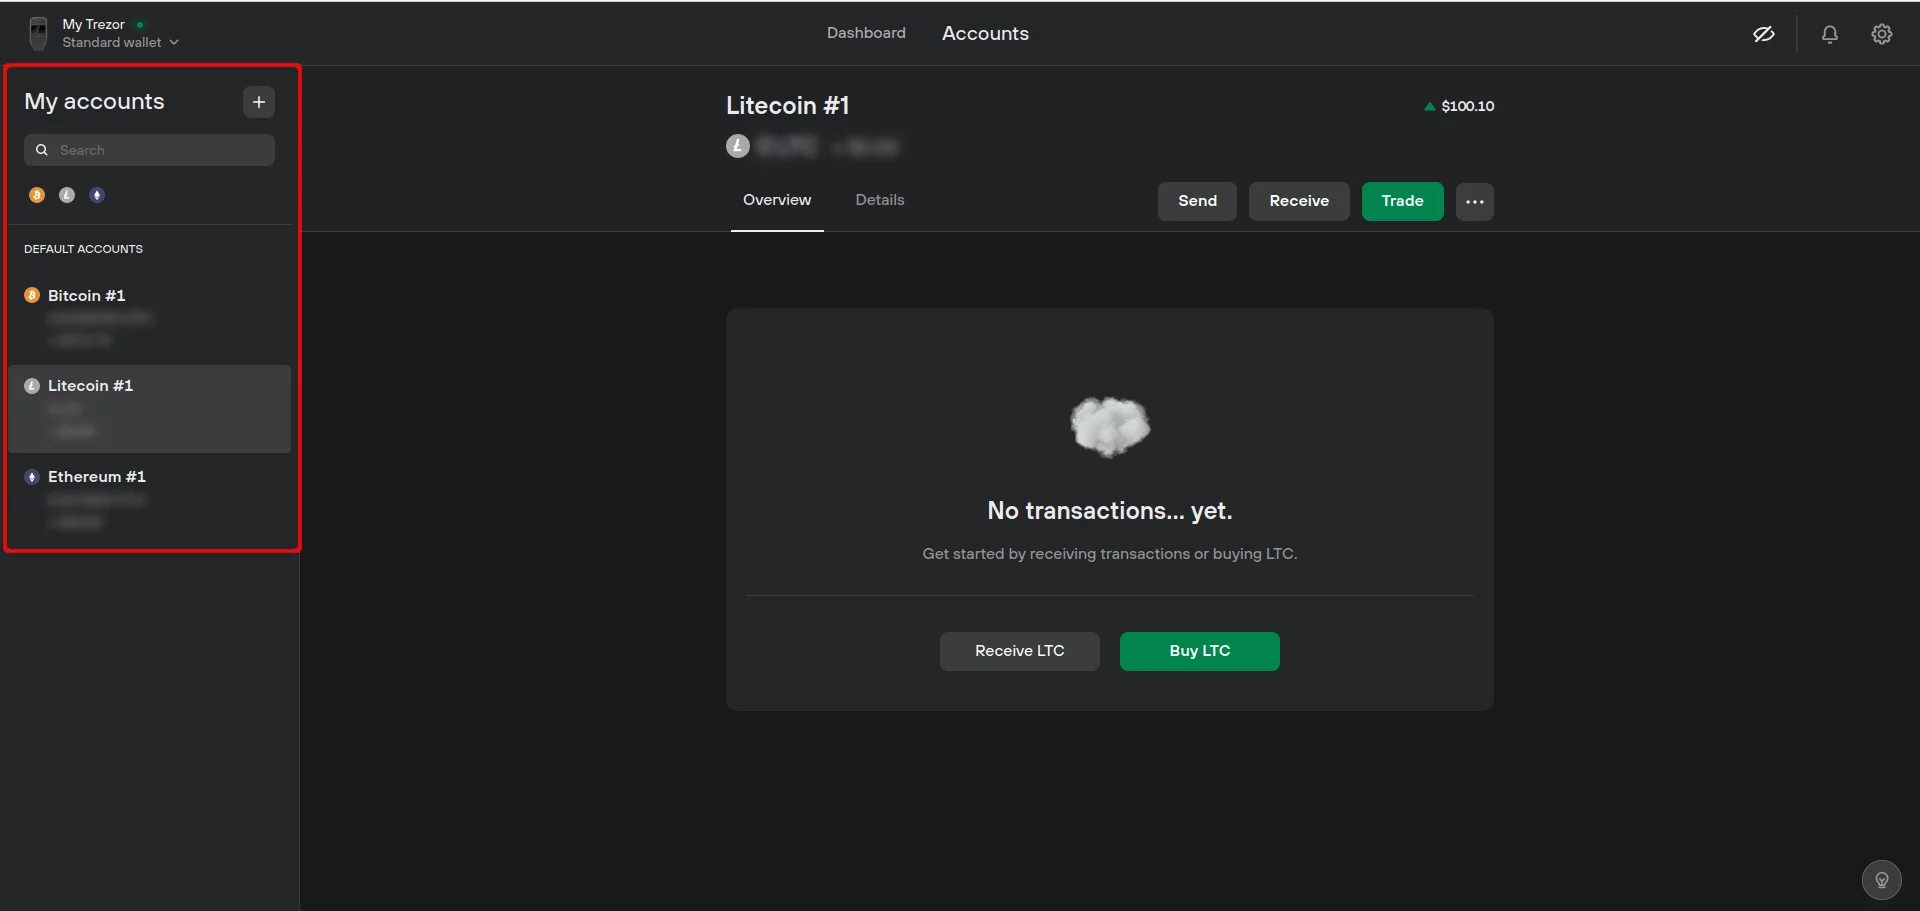
Step 8: Wallet Restored
After completing the setup process, your Trezor wallet will be successfully restored, and you will have access to your funds and transaction history.
It is crucial to keep your recovery seed phrase and PIN in a secure location, separate from your Trezor device. Losing or forgetting these security measures may result in permanent loss of access to your funds.
By following these steps, you can easily restore your Trezor wallet and regain control over your cryptocurrencies. It is a recommended practice to regularly backup your wallet and keep your recovery seed phrase and PIN secure to protect your funds and ensure peace of mind.
Q&A:
Is it necessary to backup my Trezor wallet?
Yes, it is highly recommended to backup your Trezor wallet in order to protect your funds in case of loss, theft, or any other unforeseen circumstances.
Can I restore my Trezor wallet without a backup?
No, it is not possible to restore your Trezor wallet without a backup. The backup or recovery seed is necessary to recover your funds in case you lose access to your Trezor device.
What should I do if I lose my Trezor device?
If you lose your Trezor device, you can use the recovery seed to restore your wallet on a new device. Make sure to keep your recovery seed secure and in a safe place to prevent unauthorized access to your funds.
Can I create multiple backups for my Trezor wallet?
Yes, you can create multiple backups for your Trezor wallet. It is actually recommended to have multiple copies of your recovery seed stored in different locations to ensure the safety of your funds. However, make sure to keep the backups secure and protect them from unauthorized access.


