
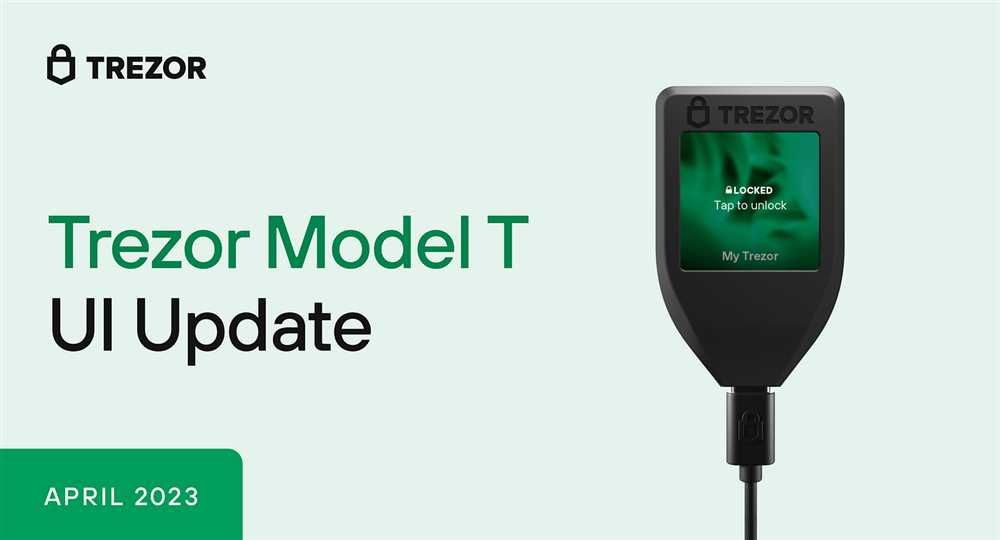
Trezor Model T Setup and Usage Guide
Welcome to the world of secure cryptocurrency storage! With the Trezor Model T, you’re taking the first step towards ensuring the safety of your digital assets. In this guide, we will walk you through the process of setting up and using your new hardware wallet, so you can have peace of mind knowing that your funds are protected.
First things first, let’s talk about why a hardware wallet like the Trezor Model T is essential for storing your cryptocurrencies. Unlike software wallets, which are susceptible to hacking and malware attacks, a hardware wallet keeps your private keys offline, away from prying eyes. The Trezor Model T takes this security to the next level with its state-of-the-art features and user-friendly interface.
To get started, the first step is to connect your Trezor Model T to your computer or mobile device using the provided USB cable. Once connected, you will be prompted to visit the Trezor website and download the Trezor Wallet. This intuitive and easy-to-use wallet software will be your gateway to managing your cryptocurrencies.
Next, it’s time to set up your Trezor Model T. The device will guide you through the process of creating a new wallet, generating a recovery seed, and setting a PIN. It is crucial to write down your recovery seed and keep it in a safe place, as this will be the only way to restore your wallet in case your device is lost or damaged.
Once your wallet is set up, you can start using your Trezor Model T to securely send and receive cryptocurrencies. With its large color touchscreen and straightforward navigation, you can easily navigate through the wallet’s features and make transactions with confidence. The Trezor Model T supports a wide range of cryptocurrencies, so you can manage all your digital assets in one place.
In conclusion, the Trezor Model T provides the ultimate solution for protecting your cryptocurrencies. By following the simple setup process and utilizing its user-friendly software, you can ensure the safety of your digital assets and have full control over your funds. Don’t compromise on security – choose the Trezor Model T and experience the peace of mind that comes with knowing your cryptocurrencies are protected.
Trezor Model T: Complete Setup Guide
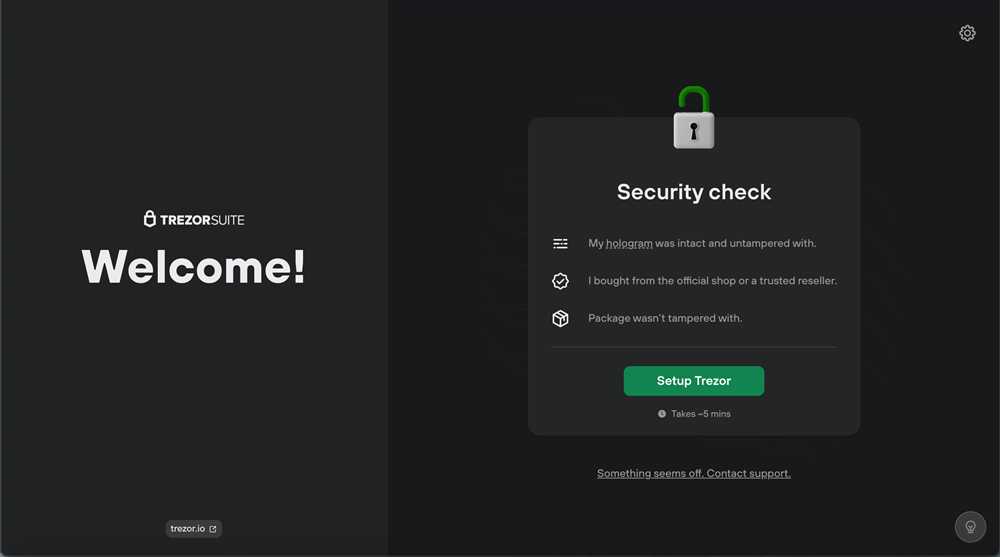
Welcome to the complete setup guide for your Trezor Model T hardware wallet. In this guide, we will walk you through the steps to set up your device and start using it to secure your cryptocurrencies.
Step 1: Unboxing and Getting Started
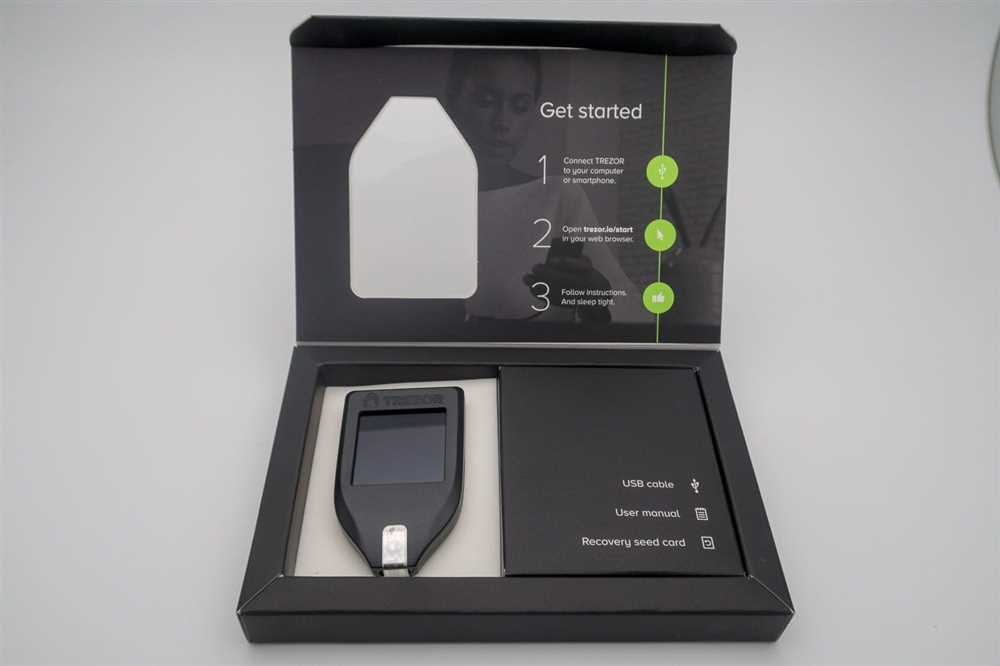
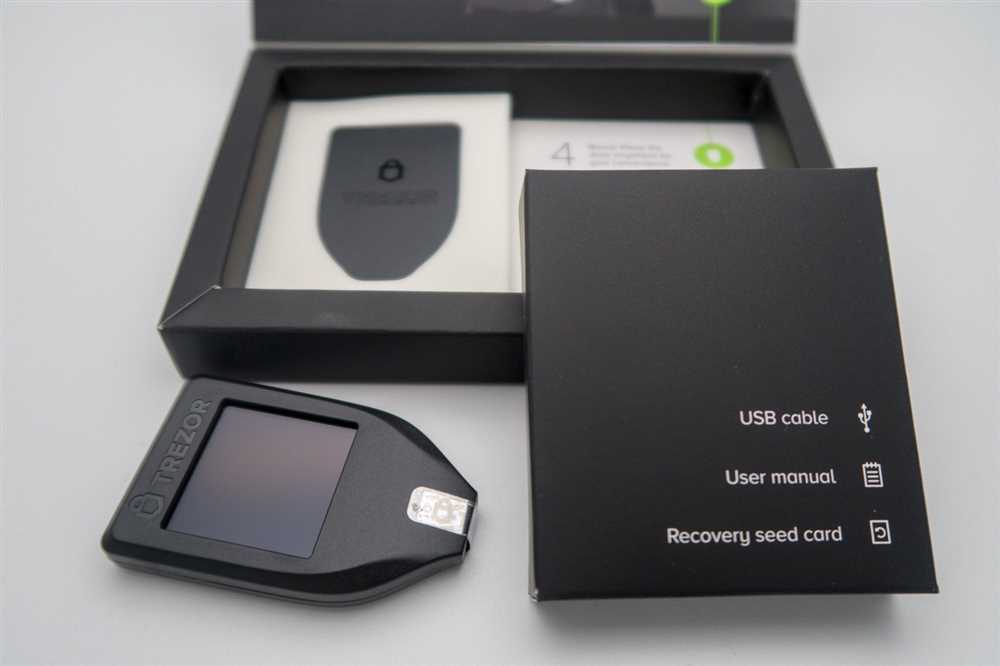
The first step is to unbox your Trezor Model T and ensure that all the necessary components are included. You should have the device itself, a USB cable, and a recovery seed card. Once you have confirmed that everything is present, you can proceed to the setup process.
Step 2: Connecting your Trezor to a Computer

Connect your Trezor Model T to your computer using the provided USB cable. Make sure that your computer has the latest version of the Trezor Bridge software installed. Once the device is connected, you will see a prompt to install the necessary firmware.
Step 3: Setting up the Device
Follow the on-screen instructions to set up your Trezor Model T. You will be prompted to choose a PIN, which will be used to access your device. Make sure to choose a PIN that is secure and easy for you to remember. Additionally, you will be asked to write down your recovery seed, which is a series of words that can be used to restore your wallet in case of loss or damage.
Step 4: Installing and Setting up the Trezor Wallet
Once your device is set up, you will need to install the Trezor Wallet software on your computer. Visit the Trezor website and download the appropriate wallet software for your operating system. Install the software and follow the prompts to connect your device to the wallet.
Step 5: Transferring and Managing Your Cryptocurrencies
With your Trezor Model T set up and the wallet software installed, you can now transfer your cryptocurrencies to your secure hardware wallet. Follow the instructions provided by the wallet software to send and receive funds, view your balances, and manage your portfolio.
Remember to always verify the recipient address on your device’s screen before confirming any transactions. This extra layer of security ensures that your funds are being sent to the intended recipient.
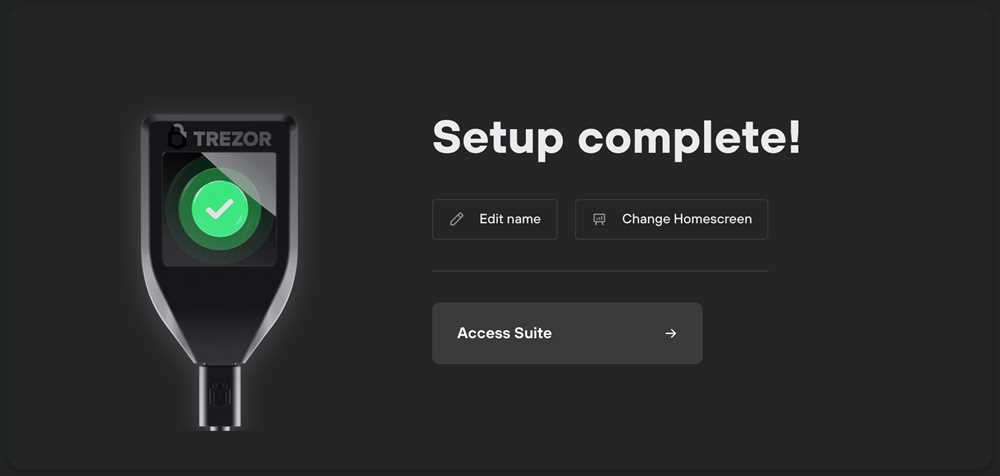
Congratulations! You have successfully set up your Trezor Model T and are now ready to securely manage your cryptocurrencies. Make sure to keep your recovery seed in a safe place and never share it with anyone.
Unboxing Your Trezor Model T
When you receive your Trezor Model T, the first thing you’ll want to do is unbox it and familiarize yourself with its contents. Here’s a step-by-step guide to help you unbox your new hardware wallet:
- Begin by finding the package that your Trezor Model T came in. It should resemble a small cardboard box.
- Look for any seals or tape that may be securing the package. Carefully remove any seals or cut any tape to open the package.
- Once the package is open, you’ll find the Trezor Model T securely placed inside. Take the hardware wallet out of the box.
- Find the USB cable that is included with the Trezor Model T. This cable will be used to connect the hardware wallet to your computer or mobile device.
- Beneath the Trezor Model T, you’ll find additional accessories. These may include a magnetic dock, a getting started guide, recovery seed cards, and stickers. Take these accessories out.
- Review the getting started guide that is included. This guide will provide detailed instructions on how to set up and use your Trezor Model T.
- Inspect the Trezor Model T for any damage or defects. If everything looks intact, you’re ready to begin the setup process.
By following these steps, you’ll successfully unbox your Trezor Model T and be ready to start using your new hardware wallet.
Initial Setup and Device Configuration
Setting up your new Trezor Model T hardware wallet is a straightforward process that ensures the highest level of security for your cryptocurrency holdings. This guide will walk you through the initial setup and device configuration step by step.
Step 1: Unboxing and Connecting the Device
To begin, open the packaging and take out your Trezor Model T device. Connect the USB-C cable to the device and plug the other end into your computer or mobile device. The device will power on automatically once it is connected.
Step 2: Accessing the Trezor Wallet Interface
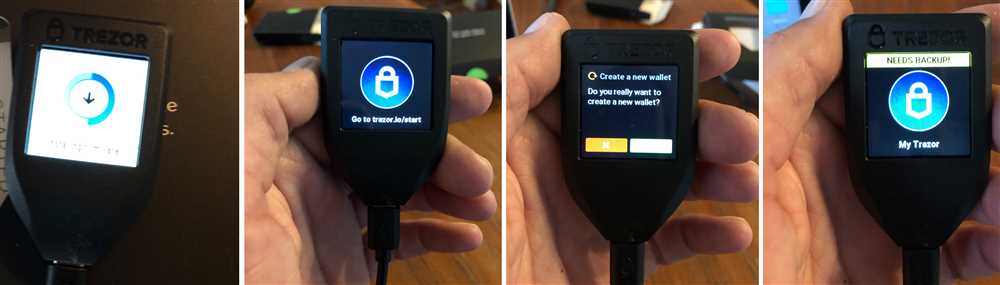
Once the device is connected, open your preferred web browser and navigate to the Trezor website. Click on the “Start Now” button to access the Trezor Wallet interface.
Step 3: Creating a New Wallet
In the Trezor Wallet interface, click on the “Create new” button to begin the process of setting up a new wallet. Follow the on-screen instructions to choose a strong PIN and write down your recovery seed. Take extra care to store your recovery seed in a secure location, as it is the only way to recover your funds if the device is lost, stolen, or damaged.
Step 4: Setting Up a Passphrase (Optional)
If you wish to add an extra layer of security, you can set up a passphrase. This passphrase acts as an additional password and is required to access your wallet. It is important to choose a strong passphrase and remember it, as forgetting it can lead to the permanent loss of your funds.
Step 5: Installing Firmware Updates
Before using your Trezor Model T, it is essential to ensure that the firmware is up to date. In the Trezor Wallet interface, go to the “Device” tab, and if a firmware update is available, follow the prompts to install it. Keeping your firmware up to date helps protect against potential security vulnerabilities.
Step 6: Configuring Additional Security Settings

Once your device is set up and the firmware is updated, you can explore and configure additional security settings. These settings include enabling the passphrase feature, enabling a U2F authenticator, and adjusting the device’s display brightness and auto-lock settings.
By following these steps, you have successfully completed the initial setup and device configuration for your Trezor Model T hardware wallet. You are now ready to securely store, send, and receive your cryptocurrency funds with peace of mind.
Creating Your First Wallet
Once you have your Trezor Model T hardware wallet, the first thing you’ll need to do is create a new wallet. Follow these steps to get started:
- Connect your Trezor to your computer using the USB cable provided.
- Open the Trezor Wallet website or download the Trezor Wallet app.
- Follow the instructions to install the wallet software on your computer or mobile device.
- Launch the wallet software and select the option to create a new wallet.
During the setup process, you will be prompted to choose a PIN code for your Trezor wallet. Make sure to choose a strong PIN code that is easy for you to remember but difficult for others to guess. This PIN code will be required every time you want to access your wallet, so it’s important to choose wisely.
After choosing your PIN code, the wallet software will generate a recovery seed for your wallet. This recovery seed is a list of 12 or 24 randomly generated words that can be used to recover your wallet in case it is lost or damaged.
Make sure to write down and store this recovery seed in a safe and secure place. It is crucial to keep this seed in a location where it cannot be lost, stolen, or accessed by unauthorized individuals. Losing your recovery seed could result in permanent loss of your funds.
Once you have completed the setup process and have your recovery seed safely stored, your wallet is now ready to use. You can now send and receive cryptocurrencies, check your account balance, and manage your assets using your Trezor Model T hardware wallet.
Remember to always keep your Trezor device and recovery seed safe. Do not share your PIN code or recovery seed with anyone.
Now that you’ve created your first wallet, you can explore the many features and functionalities offered by the Trezor Model T to enhance the security and convenience of managing your cryptocurrencies.
Transferring and Securing Your Cryptocurrencies
After setting up your Trezor Model T and creating a wallet for your cryptocurrencies, the next step is to transfer and secure your digital assets. Here are some important steps to follow:
1. Choose the Right Wallet
Before transferring your cryptocurrencies, make sure you’re using a compatible wallet that supports your specific coins or tokens. Trezor Model T is compatible with popular wallets like Trezor Wallet, Mycelium, and Exodus.
2. Backup Your Wallet
Before transferring any funds, it’s crucial to create a backup of your wallet’s seed phrase. This seed phrase will allow you to recover your funds in case your device gets lost, stolen, or damaged. Write down the seed phrase on a piece of paper and keep it in a safe place.
Important: Never store your seed phrase digitally or share it with anyone. This is the most critical piece of information needed to access your funds, and anyone with access to it can potentially steal your cryptocurrencies.
3. Connect Your Trezor Model T
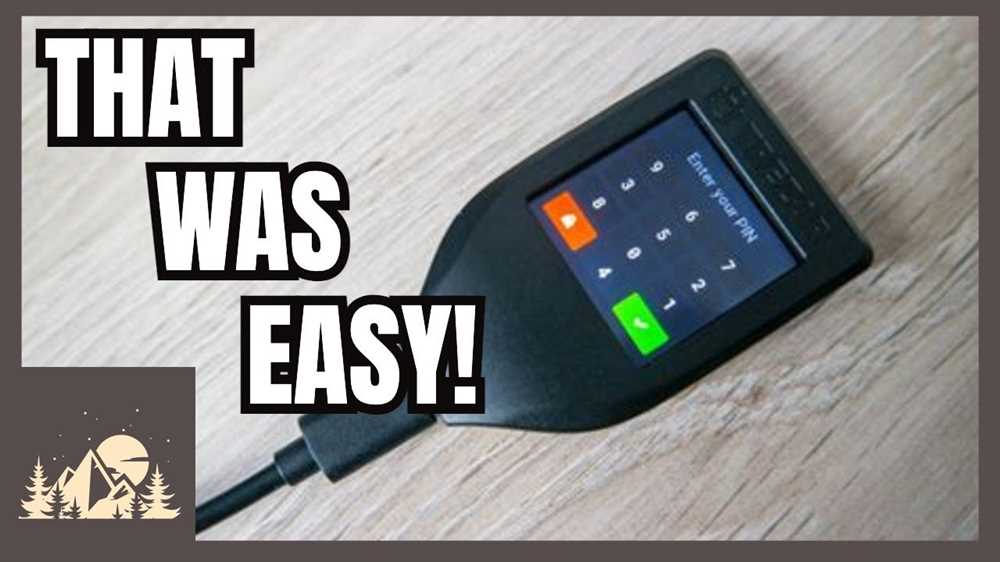
Connect your Trezor Model T to your computer or mobile device using the USB cable provided. Follow the on-screen instructions to unlock your Trezor and enter your PIN.
4. Open your Wallet Software
Open the compatible wallet software that you’ve chosen and select the option to connect to your Trezor Model T. Follow the prompts on the screen to complete the connection.
5. Select the Cryptocurrency

In your wallet software, choose the specific cryptocurrency that you want to transfer. This will typically involve selecting the coin or token from a dropdown menu.
6. Initiate the Transfer
Enter the destination address where you want to transfer your cryptocurrencies. This address is usually generated by the recipient’s wallet or exchange platform. Double-check the address to ensure it is correct before confirming the transfer.
Tip: Consider starting with a small test transfer to verify that everything is working correctly before moving larger amounts.
7. Confirm the Transfer
After verifying the transfer details, confirm the transaction on your Trezor Model T device. Follow the on-screen instructions, and make sure to double-check the recipient address and the amount being transferred.
8. Secure Your Device
Once the transfer is complete, disconnect your Trezor Model T from the computer or mobile device. Always keep your Trezor device in a safe place and protected from physical damage and unauthorized access.
Tip: Consider enabling additional security features, such as a passphrase or 2-factor authentication, for an added layer of protection.
By following these steps, you can securely transfer and store your cryptocurrencies using the Trezor Model T hardware wallet.
Question-answer:
What is the Trezor Model T?
The Trezor Model T is a hardware wallet that allows you to securely store your cryptocurrencies. It is a small device that you connect to your computer or smartphone via USB or Bluetooth.
How do I set up the Trezor Model T?
To set up the Trezor Model T, you need to first connect it to your computer or smartphone. Then, you need to follow the instructions on the device’s screen to create a new wallet and set up a security PIN. Finally, you will be given a recovery seed, which you should write down and keep in a safe place.
Can I use the Trezor Model T with multiple cryptocurrencies?
Yes, the Trezor Model T supports a wide range of cryptocurrencies, including Bitcoin, Ethereum, Litecoin, and many others. You can use the device to store and manage multiple cryptocurrencies at the same time.


