
The ultimate guide to sending USDT to any wallet
In this comprehensive guide, we will walk you through the process of sending USDT (Tether) to any wallet of your choice. Whether you are new to cryptocurrency or an experienced trader, this step-by-step tutorial will help you navigate the intricacies of transferring USDT with ease and confidence.
USDT is a popular stablecoin that is pegged to the value of the US dollar. It is widely used in the cryptocurrency world for its stability and liquidity. Being able to send USDT to any wallet is essential for buying, selling, or simply storing this digital asset securely.
Before we dive into the technicalities, it is important to note that USDT can be stored in various types of wallets, including hardware wallets, desktop wallets, and mobile wallets. Each type of wallet has its own advantages and security features, so it is important to choose the one that suits your needs best.
Now, let’s get started and learn how to send USDT to any wallet in just a few simple steps. We will cover everything from setting up a wallet to confirming the transaction, ensuring that you have all the necessary knowledge to carry out this process successfully.
Step-by-Step Instructions for Sending USDT
Follow these step-by-step instructions to send USDT to any wallet:
Step 1: Prepare Your USDT Wallet
Make sure you have a USDT wallet set up and ready to use. If you don’t have one, you can easily create a USDT wallet on various cryptocurrency exchanges or wallet services.
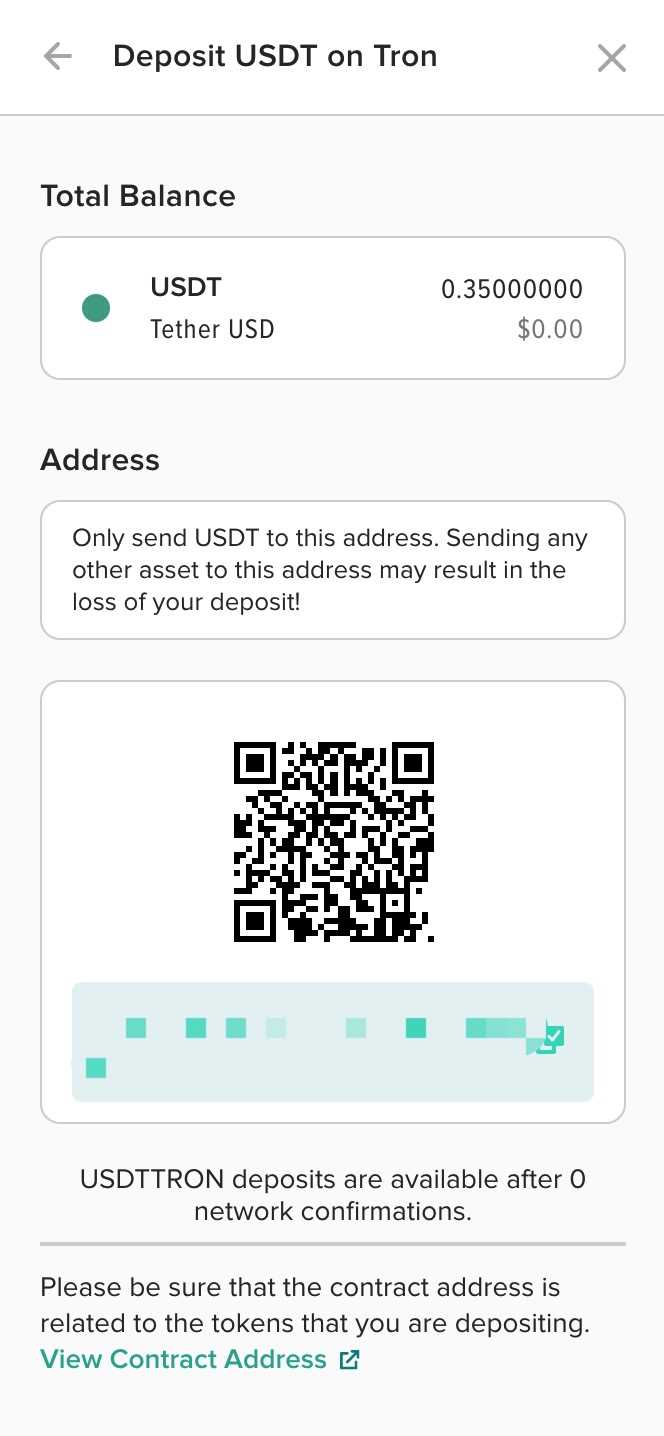
Step 2: Get the Recipient’s Wallet Address
Obtain the wallet address of the recipient, ensuring it is a USDT wallet. The address usually consists of a series of alphanumeric characters.
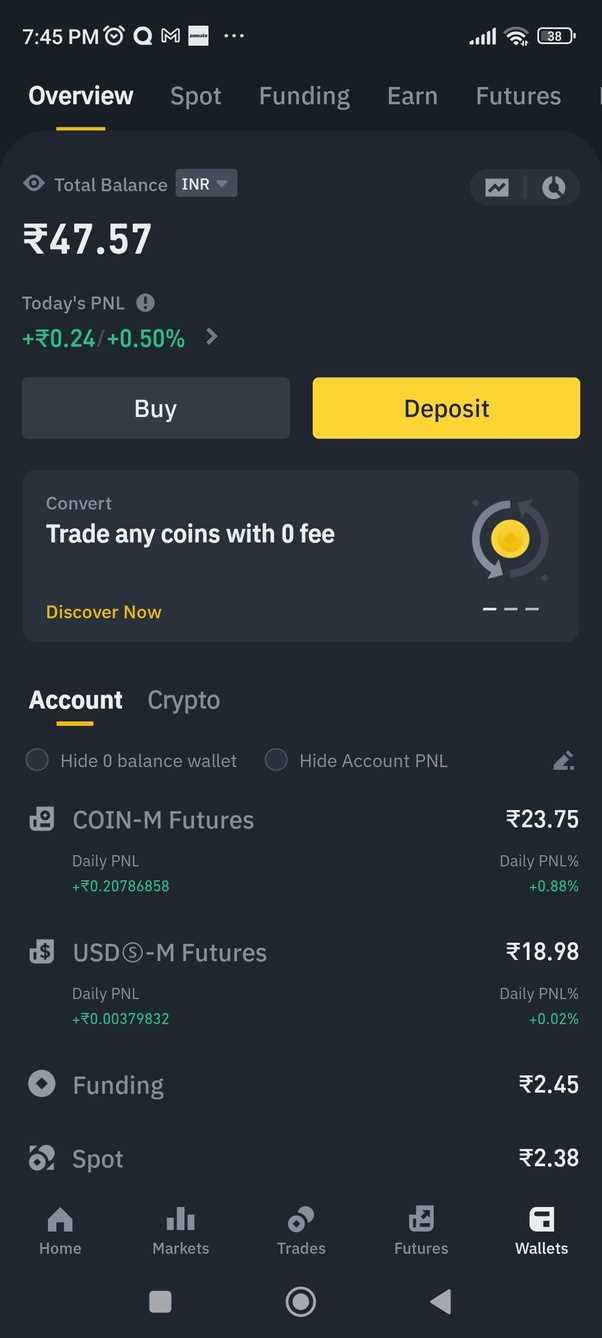
Step 3: Access your USDT Wallet
Log in to your USDT wallet using your credentials. This may require providing your username, password, and any additional security measures such as 2-factor authentication.
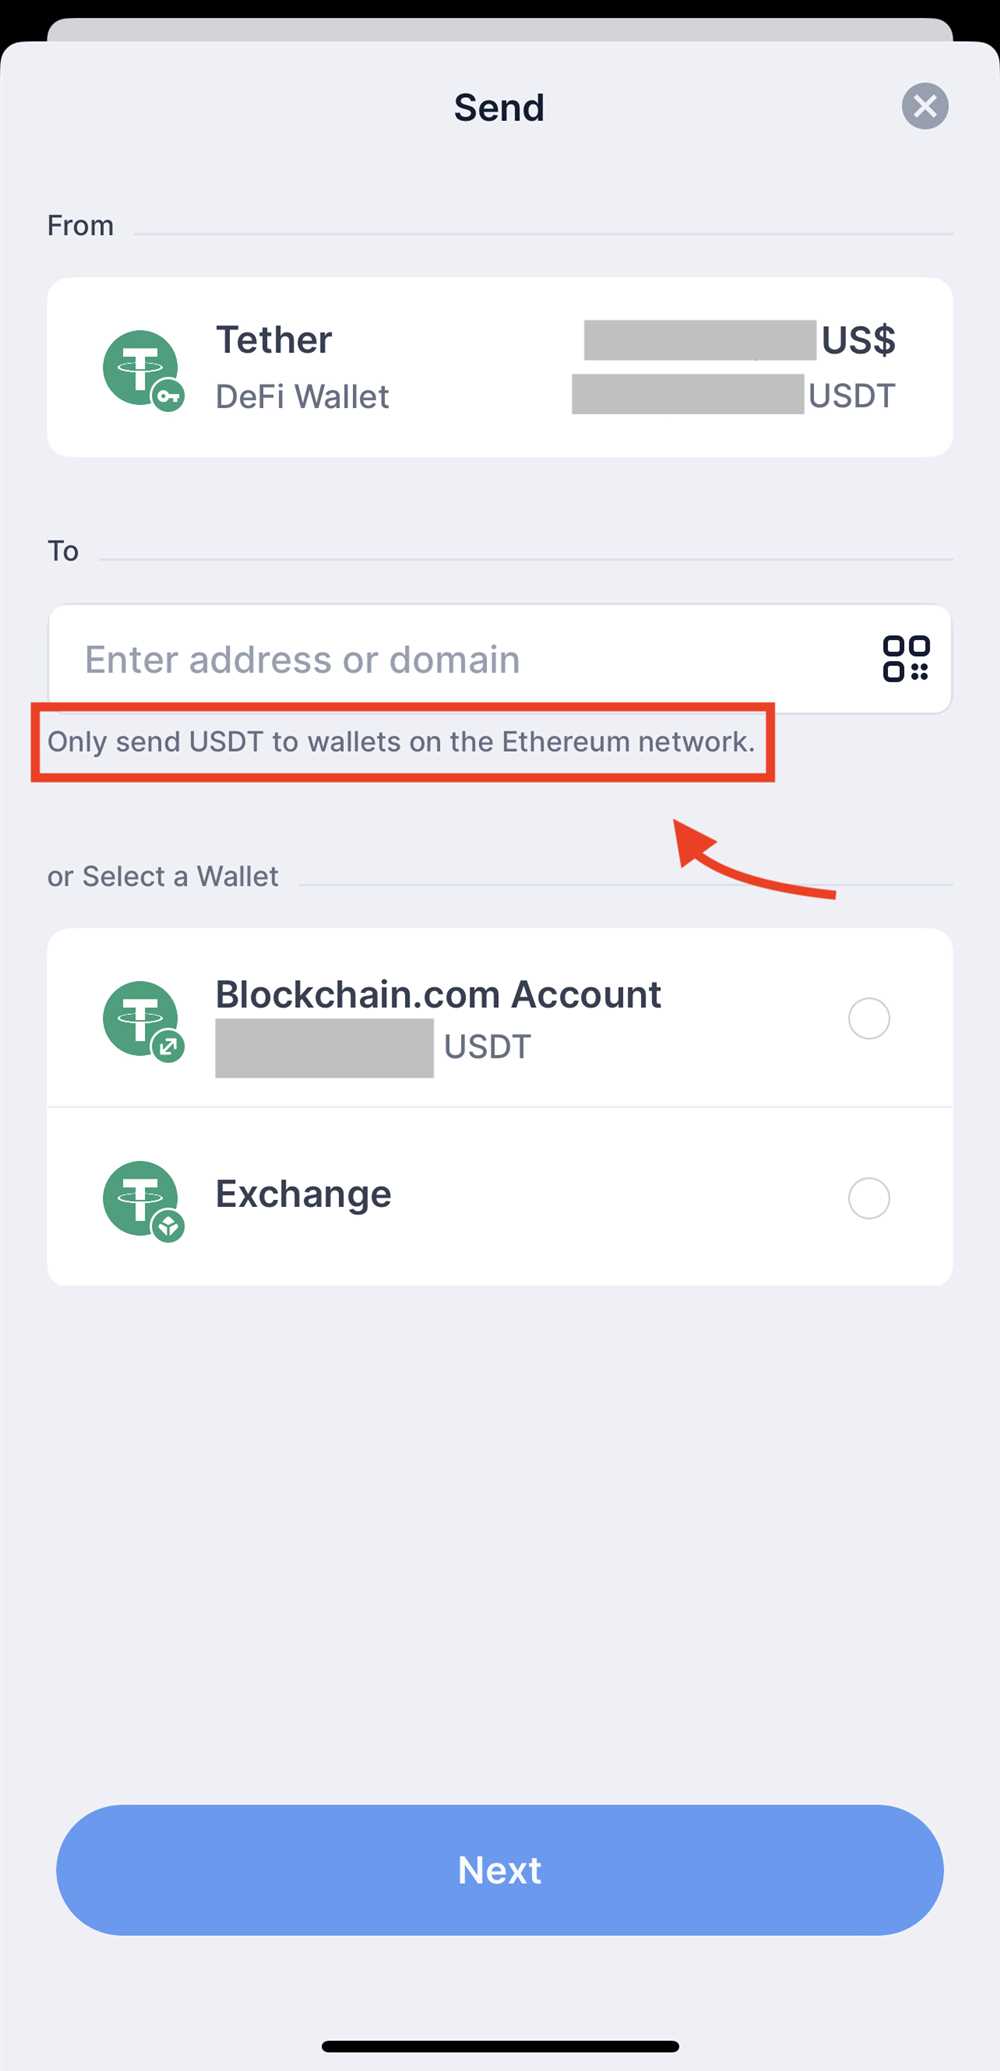
Step 4: Select “Send”
Within your USDT wallet, locate and select the “Send” or “Send USDT” option. This option is typically found on the main dashboard or navigation menu of the wallet.
Step 5: Enter the Recipient’s Wallet Address
In the “Send” form, paste the recipient’s USDT wallet address into the designated field. Double-check that the address is correct to ensure the funds reach the intended recipient.
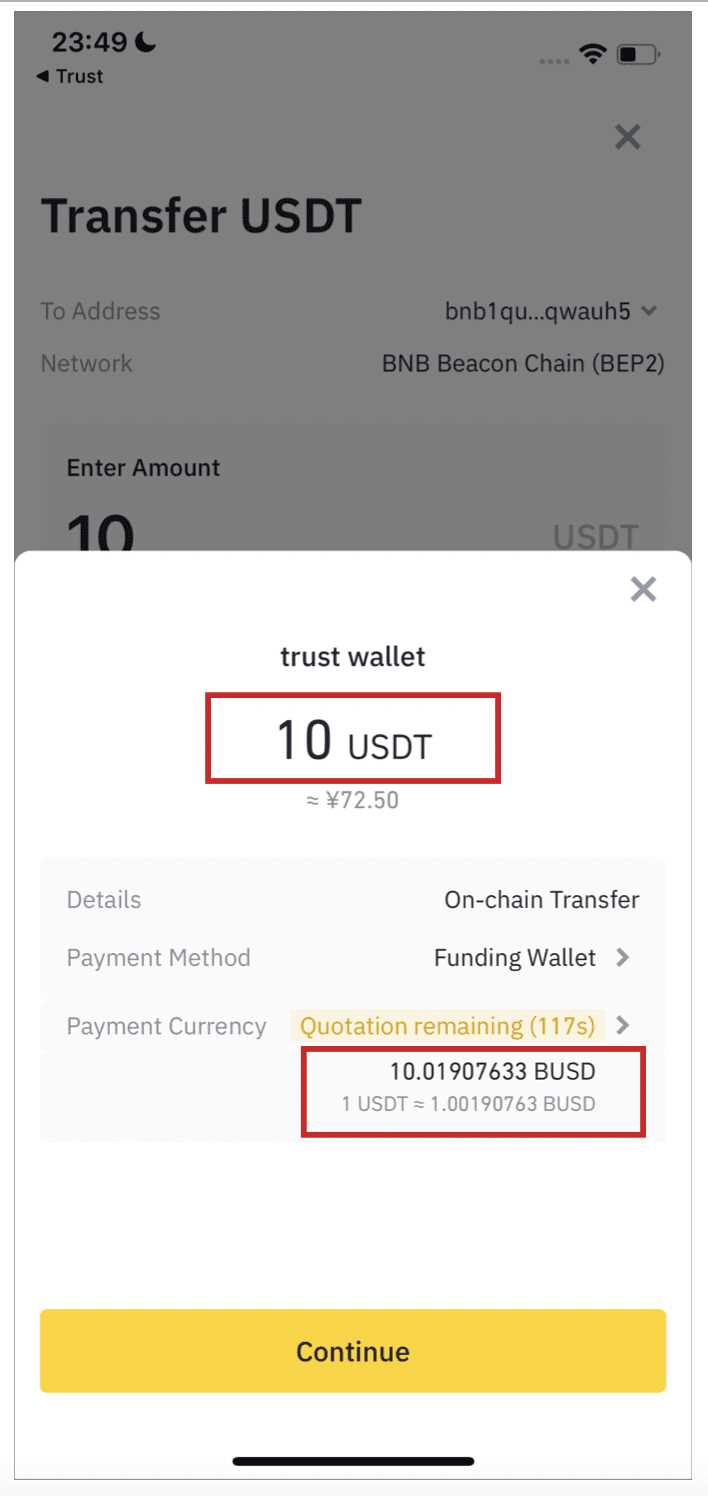
Step 6: Specify the Amount
Enter the amount of USDT you wish to send to the recipient. Ensure the amount is accurate and within your available balance. Be aware of any transaction fees that may be deducted from the total amount being sent.
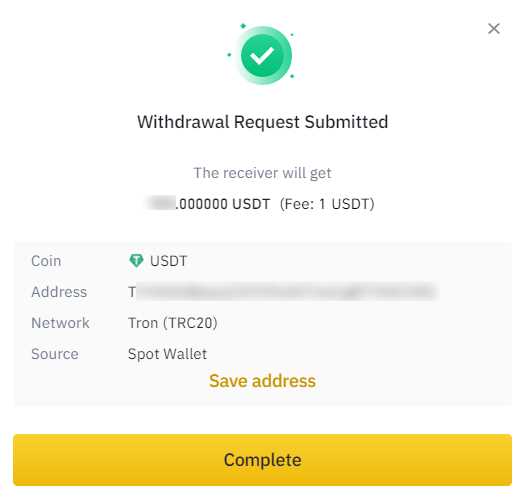
Step 7: Confirm the Transaction Details
Before submitting the transaction, review the details carefully. Pay attention to the recipient’s wallet address, the amount being sent, and any applicable transaction fees. Confirm that everything is correct, as transactions are usually irreversible.
Step 8: Initiate the Transaction
Once you are certain that all the details are accurate, initiate the transaction by selecting the “Send” or “Confirm” button. This will submit the transaction to be processed on the USDT network.
Step 9: Wait for Confirmation
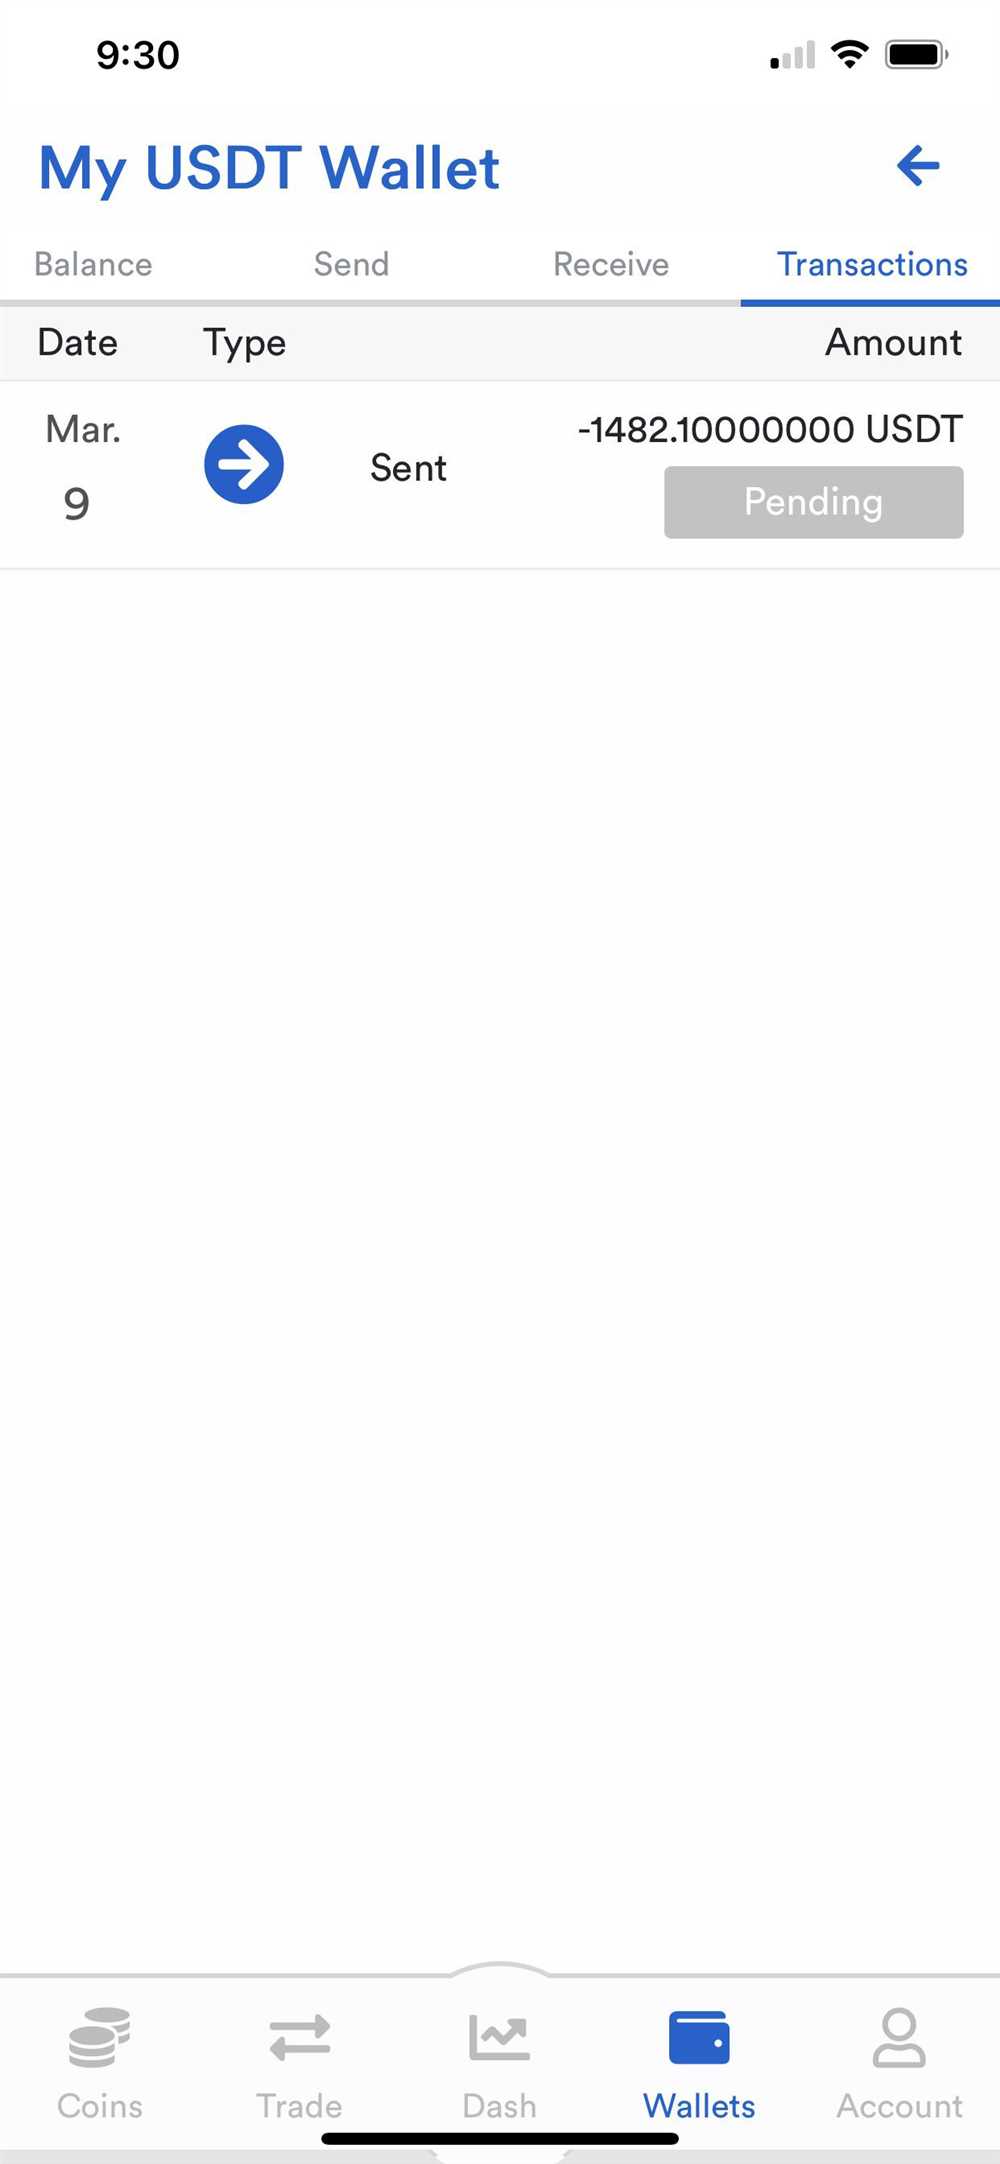
After initiating the transaction, wait for it to be confirmed on the USDT network. This process may take a few minutes to several hours, depending on network congestion and other factors. Be patient and avoid making any unnecessary actions during this time.
Step 10: Verify the Transaction
Once the transaction is confirmed, you should receive a confirmation notification. You can also verify the transaction by checking the recipient’s wallet address on a USDT blockchain explorer. This will display the transaction details and confirm that the USDT has been sent successfully.
Congratulations! You have successfully sent USDT to any wallet using these step-by-step instructions.
Tips and Best Practices for Successful USDT Transactions
When sending USDT to any wallet, it is important to follow a few tips and best practices to ensure a successful transaction. Here are some recommendations to keep in mind:
|
Double-check the recipient address: |
Before proceeding with the transaction, always verify the recipient wallet address. Any mistakes in the address can result in the permanent loss of funds. |
|
Use a reputable wallet: |
Choose a reliable and trusted wallet for storing and sending USDT. Using a reputable wallet ensures that your funds are secure and that the transaction will be processed efficiently. |
|
Check the transaction fees: |
Pay attention to the transaction fees associated with sending USDT. Different wallets and platforms may have varying fee structures, so it’s essential to compare and choose the most cost-effective option for your needs. |
|
Keep track of network congestion: |
During times of high network congestion, such as during peak trading hours, transaction processing times may be slower. It’s advisable to check the network status and plan your transactions accordingly to avoid delays. |
|
Enable two-factor authentication: |
Adding an extra layer of security to your wallet by enabling two-factor authentication (2FA) can help protect your USDT against unauthorized access and prevent potential hacks or thefts. |
By following these tips and best practices, you can increase the likelihood of successful USDT transactions and minimize any potential risks or issues that may arise during the process.
Q&A:
Why would I want to send USDT to another wallet?
There are several reasons why you might want to send USDT to another wallet. One reason could be if you are trading USDT on different cryptocurrency exchanges and need to move your funds between wallets. Another reason could be if you are sending USDT to someone else as a payment or to participate in a crowdfunding campaign. Additionally, you might want to send USDT to a hardware wallet for added security.
What is the process of sending USDT to another wallet?
The process of sending USDT to another wallet involves a few steps. First, you need to have an account with a cryptocurrency exchange or a wallet that supports USDT. Then, you need to generate a receiving address for the destination wallet. Finally, you need to initiate a transfer from your current wallet to the destination wallet by providing the receiving address and confirming the transaction.
Are there any fees involved in sending USDT to another wallet?
Yes, there are typically fees involved in sending USDT to another wallet. The fees can vary depending on the exchange or wallet you are using and the amount of USDT you are sending. It’s important to check the fee structure of your chosen exchange or wallet before initiating the transfer.
How long does it take to send USDT to another wallet?
The time it takes to send USDT to another wallet can vary depending on several factors. It can depend on the congestion of the blockchain network at the time of the transfer, the speed of the exchange or wallet you are using, and any additional confirmation requirements. In general, USDT transactions can be confirmed within a few minutes to a few hours.
What happens if I make a mistake when sending USDT to another wallet?
If you make a mistake when sending USDT to another wallet, such as entering an incorrect receiving address, the transaction can be irreversible. It is important to carefully double-check the receiving address before confirming the transaction to avoid any errors. If you do make a mistake, you should reach out to the customer support of the exchange or wallet you are using for assistance.


