
Set Up and Use Trezor and Exodus Wallets for Maximum Security
Welcome to the ultimate guide for securing your digital assets! In today’s digital era, it is essential to prioritize the security of your cryptocurrency investments. One of the most effective ways to do so is by utilizing hardware wallets, such as Trezor and Exodus.
Trezor is a leading hardware wallet that offers top-notch security features to keep your crypto safe. Setting up your Trezor wallet is quick and straightforward. Begin by connecting your Trezor device to your computer using the provided USB cable. Follow the on-screen instructions to install the necessary software.
Once the setup is complete, create a strong and unique PIN for your Trezor device. It is crucial to choose a PIN that is not easily guessable and avoid using common sequences or personal information. Remember, your PIN is the first line of defense protecting your assets.
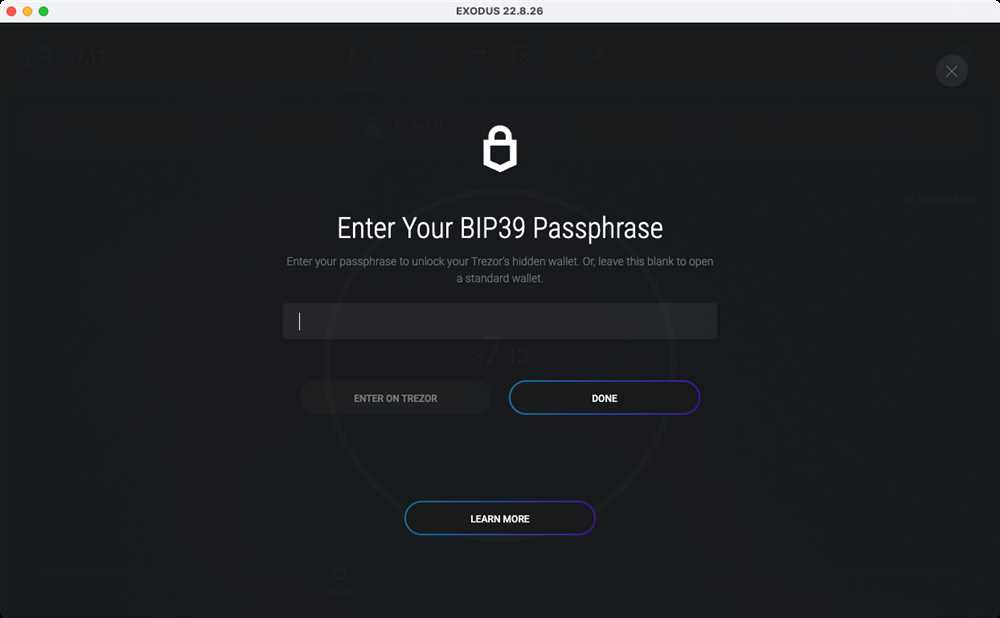
Next, you’ll be presented with a 24-word recovery seed. This seed acts as a backup in case your Trezor is lost or damaged. Write down these words on a piece of paper and store it in a secure location. Never store this seed digitally, as it could be compromised by hackers.
Exodus, on the other hand, is a software wallet that provides a user-friendly interface and supports a wide range of cryptocurrencies. To get started with Exodus, download and install the wallet from their official website. Once the installation is complete, launch the application.
To enhance the security of your Exodus wallet, set up a strong password during the initial setup. Choose a password that includes a combination of uppercase and lowercase letters, numbers, and symbols. Furthermore, enable two-factor authentication (2FA) to add an extra layer of security.
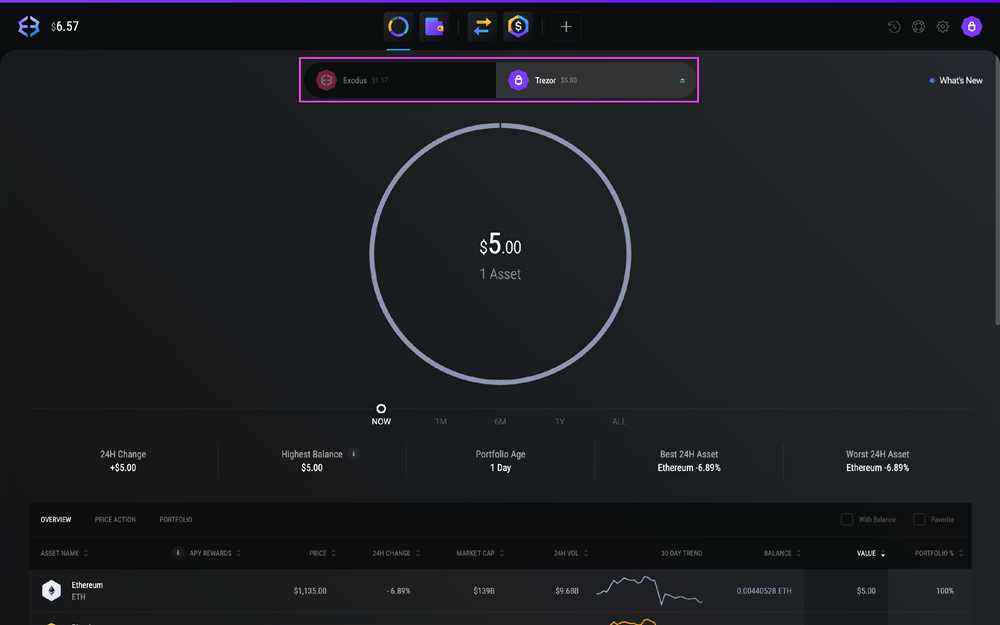
After setting up your Exodus wallet, you can start adding your cryptocurrencies. Exodus supports various coins and tokens. Simply click on the “Receive” icon, copy your wallet address, and use it to send your assets from an exchange or another wallet.
Remember, the best security practice is to keep the majority of your crypto assets stored in your hardware wallet like Trezor, with only a small amount in your software wallet for day-to-day transactions. With both Trezor and Exodus working together, you can achieve the ultimate security for your digital assets.
By following this step-by-step guide, you can set up and utilize Trezor and Exodus wallets with ease while ensuring the utmost security for your cryptocurrencies. Safeguard your investments and enjoy peace of mind knowing that your digital assets are protected from potential threats.
How to Set Up Trezor Wallet for Ultimate Security
Setting up a Trezor wallet is a crucial step in ensuring the ultimate security of your cryptocurrency assets. Follow these simple steps to get started:
- Get the Trezor device: Purchase a Trezor hardware wallet from the official Trezor website or an authorized retailer. Make sure to buy from a trusted source to avoid any tampering or counterfeit devices.
- Unbox and connect: Once you have the Trezor device, unbox it and connect it to your computer using the provided USB cable.
- Install Trezor Bridge: To use the Trezor wallet, you need to install the Trezor Bridge software on your computer. Visit the official Trezor website and download the appropriate version for your operating system.
- Open Trezor Wallet: After installing the Trezor Bridge, open the Trezor Wallet page in your web browser. Make sure the device is still connected to your computer.
- Set up your wallet: Follow the on-screen instructions to set up your Trezor wallet. Create a new wallet and choose a strong password. Make sure to write down your recovery seed on a piece of paper and keep it in a safe place.
- Configure PIN: Set a PIN for your Trezor device to protect it from unauthorized access. Make sure to choose a PIN that is not easy to guess and keep it confidential.
- Update firmware: It is essential to keep your Trezor firmware up to date to ensure the latest security features. Check for any firmware updates on the Trezor Wallet page and follow the instructions to update it if necessary.
- Start using your Trezor wallet: Once your wallet is set up and firmware is updated, you can start using your Trezor wallet to securely store and manage your cryptocurrencies. Follow the instructions provided on the Trezor Wallet page to send, receive, and manage your assets.
Remember to always keep your Trezor device and recovery seed safe and secure. By following these steps, you can have peace of mind knowing that your cryptocurrencies are protected by the ultimate security provided by Trezor.
Utilizing Trezor Wallet for Secure Transactions
When it comes to securing your cryptocurrency transactions, utilizing a hardware wallet like Trezor is essential. Trezor offers a high level of security by keeping your private keys offline and away from potential online threats.
Here are the steps to utilize your Trezor wallet for secure transactions:
- Connect your Trezor wallet to your computer: Insert your Trezor device into a USB port and ensure that it is properly connected.
- Follow the setup instructions: If your Trezor device is new or hasn’t been set up yet, follow the on-screen instructions to set up your wallet and create a new PIN.
- Access the Trezor wallet interface: Open the Trezor wallet interface on your computer by visiting the official Trezor website or using a compatible app.
- Enter your PIN: When prompted, enter your PIN using the device’s touch screen. Make sure to keep your PIN secure and avoid sharing it with anyone.
- Authorize transactions: To authorize a transaction, follow the instructions on the interface and confirm the transaction details on your Trezor device’s screen. This step ensures that only you can approve transactions.
- Review transaction details: Double-check the transaction details on the Trezor wallet interface before confirming the transaction. This step helps prevent any mistakes or fraudulent transactions.
- Confirm the transaction: Once you have reviewed and verified the transaction details, confirm the transaction on your Trezor device by pressing the appropriate button.
- Keep your Trezor device safe: After completing the transaction, safely disconnect your Trezor device from your computer and store it in a secure place.
By utilizing your Trezor wallet for secure transactions, you greatly reduce the risk of losing your cryptocurrency to hackers or online scams. Remember to always verify transaction details and keep your Trezor device safe to maintain the highest level of security.
Note: This guide assumes that you have already set up your Trezor device and have basic knowledge of cryptocurrency transactions.
Getting Started with Exodus Wallet: Step-by-Step Guide
Welcome to the step-by-step guide on getting started with Exodus Wallet! In this guide, we will walk you through the process of setting up and utilizing Exodus Wallet for ultimate security. Follow these steps to get started:
Step 1: Download Exodus Wallet
The first step is to download Exodus Wallet to your preferred device. Exodus Wallet is available for Windows, Mac, and Linux operating systems. Visit the official Exodus website and click on the download button for your operating system.
Step 2: Installation
Once the download is complete, navigate to the downloaded file and open it to start the installation process. Follow the on-screen instructions to install Exodus Wallet on your device.
Step 3: Creating a New Wallet
After the installation is complete, launch Exodus Wallet. You will be greeted with a welcome screen. Click on the “Create Wallet” button to proceed.
Step 4: Setting Up a Strong Password
Next, you will be prompted to set up a strong password for your Exodus Wallet. Make sure to choose a unique password that you can remember. Avoid using common passwords or phrases.
Step 5: Backup Your Wallet
Once you have set up your password, Exodus Wallet will ask you to back up your wallet. Follow the instructions provided to create a backup phrase. This backup phrase is crucial as it allows you to recover your wallet if your device is lost or damaged.
Step 6: Add Cryptocurrencies to Your Wallet
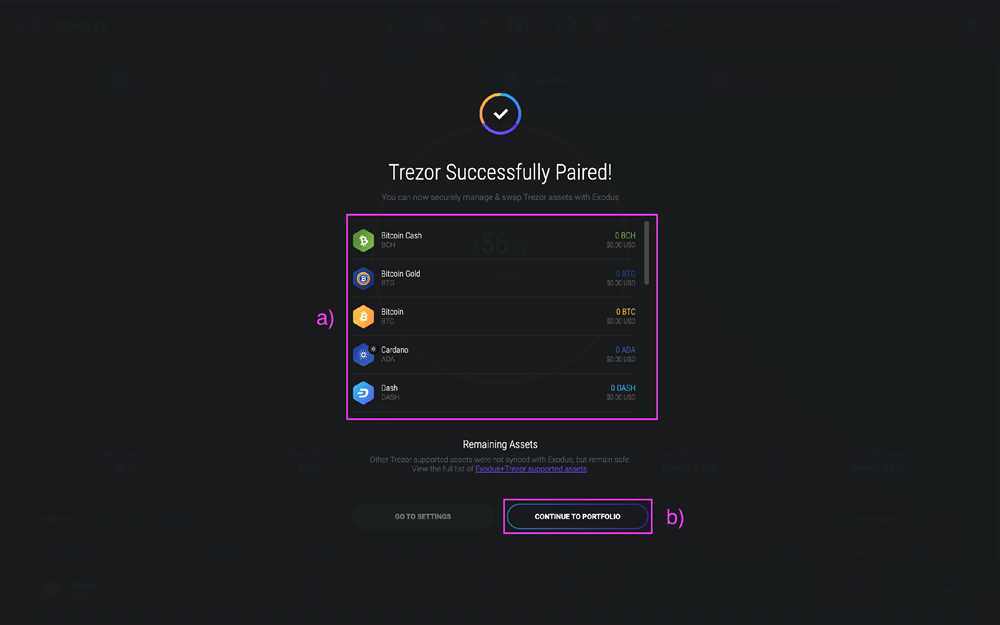
With your wallet set up, you can now add cryptocurrencies to it. Exodus Wallet supports a wide range of cryptocurrencies, including Bitcoin, Ethereum, and Litecoin. Click on the “Wallet” tab and select the “Add More” option to add your desired cryptocurrencies to your wallet.
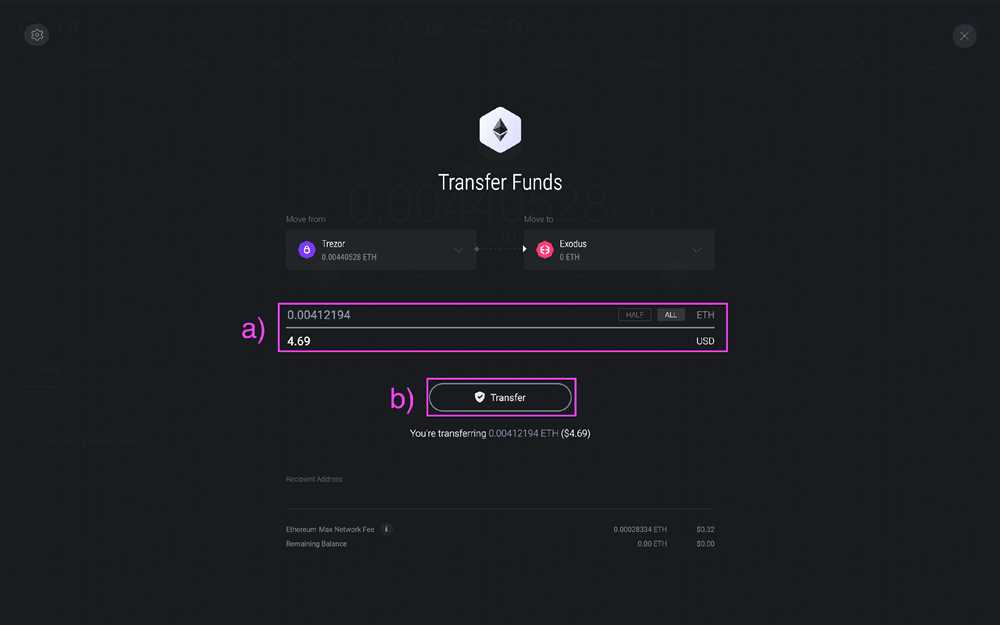
Step 7: Sending and Receiving Cryptocurrencies
Once you have added cryptocurrencies to your Exodus Wallet, you can easily send and receive them. Simply click on the respective cryptocurrency in your wallet and select the send or receive option. Follow the on-screen instructions to complete the transaction.
Congratulations! You have successfully set up and started using Exodus Wallet. Remember to keep your password and backup phrase secure to ensure the safety of your cryptocurrencies.


