
Guide to Setting Up and Installing the TREZOR Wallet
Welcome to the TREZOR Wallet Setup and Installation Guide! If you’re new to the world of cryptocurrencies and want to protect your digital assets, using a hardware wallet like TREZOR is a great choice. This guide will walk you through the setup and installation process, ensuring that your funds are stored securely.
What is TREZOR?
TREZOR is a hardware wallet that allows you to store your cryptocurrencies offline, away from potential online threats. It provides an extra layer of security by keeping your private keys offline and out of reach from hackers. With TREZOR, you can safely store your Bitcoin, Ethereum, and other popular cryptocurrencies.
In this guide, we’ll take you through the step-by-step process of setting up your TREZOR wallet and ensuring that it’s properly installed. We’ll cover everything from unboxing your TREZOR device to creating your first wallet and making your first transaction.
Let’s get started! Follow the instructions below to set up your TREZOR wallet and start securing your digital assets.
TREZOR Wallet Setup
Setting up your TREZOR wallet is a simple and straightforward process. Follow the steps below to get your wallet up and running:
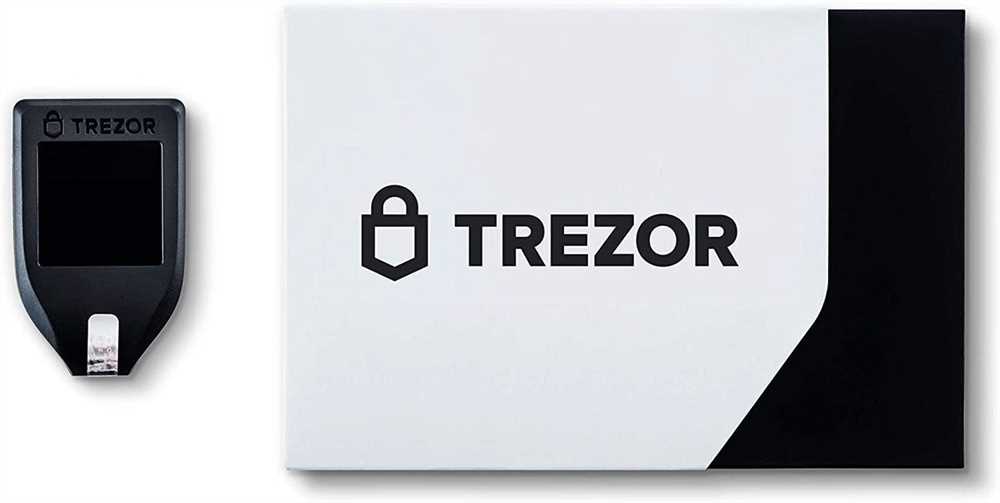
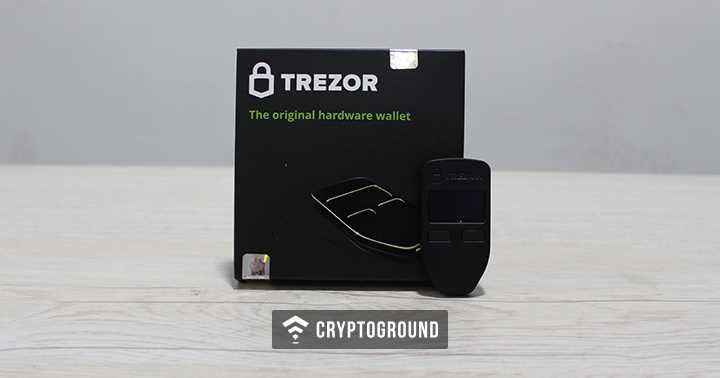
Step 1: Unboxing and Preparing Your TREZOR Device
Start by unboxing your TREZOR device and plugging it into your computer using the provided USB cable. Make sure the device is connected securely.
Step 2: Installing TREZOR Bridge
To communicate with your TREZOR device, you’ll need to install TREZOR Bridge. Visit the official TREZOR website and download the appropriate version for your operating system. Once the installation is complete, run the software and follow the on-screen instructions.
Step 3: Setting Up Your TREZOR Wallet
Next, you’ll need to set up your TREZOR wallet by following these steps:
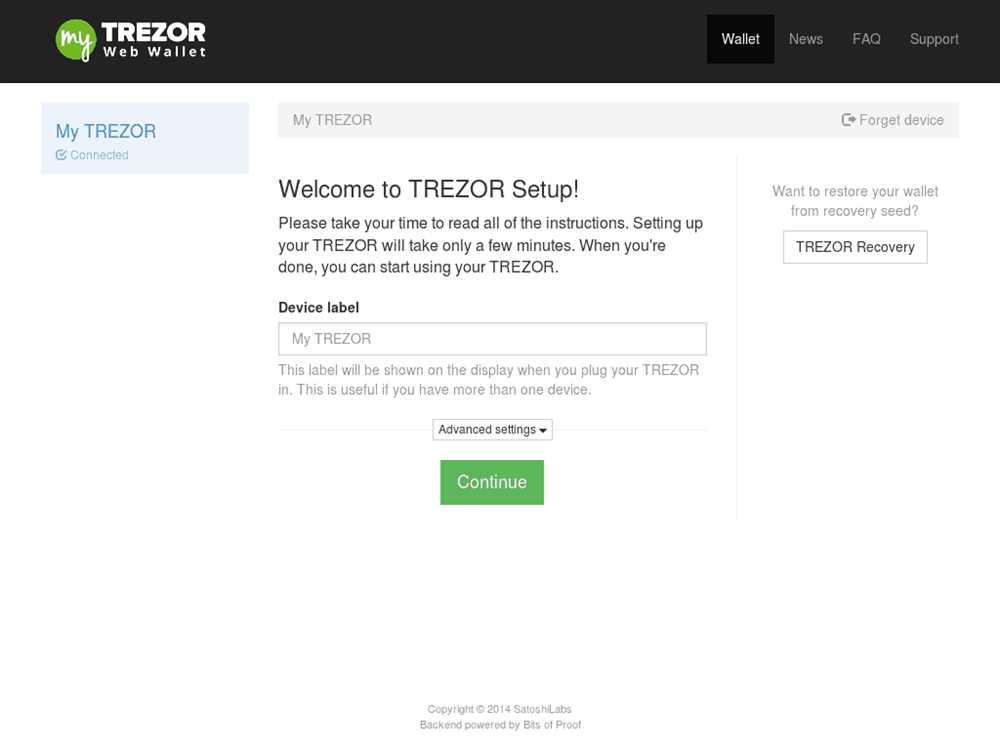
- On your computer, navigate to wallet.trezor.io in your preferred web browser.
- Click on “Create New Wallet” and choose a strong, unique password for your wallet. Make sure to remember this password as it will be required to access your funds.
- Connect your TREZOR device to your computer and follow the on-screen instructions to complete the setup process.
- Once your wallet is set up, you can start managing your cryptocurrencies securely using the TREZOR hardware wallet.
Remember to keep your TREZOR device and password in a safe place. Losing either of them may result in permanent loss of your funds.
Congratulations! You have now successfully set up your TREZOR wallet and are ready to securely store and manage your cryptocurrencies.
Step-by-Step Installation Guide
Follow these steps to set up and install your TREZOR wallet:
Step 1: Connect your TREZOR device to your computer using the USB cable provided.
Step 2: Visit the TREZOR website and download the TREZOR Bridge software.
Step 3: Install the TREZOR Bridge software on your computer by following the on-screen instructions.
Step 4: Once the installation is complete, open the TREZOR Bridge software.
Step 5: Follow the on-screen prompts to update the firmware of your TREZOR device.
Step 6: After the firmware update is complete, launch the TREZOR Wallet.
Step 7: Create a new wallet by following the instructions on the screen.
Step 8: Set a strong and unique PIN for your wallet.
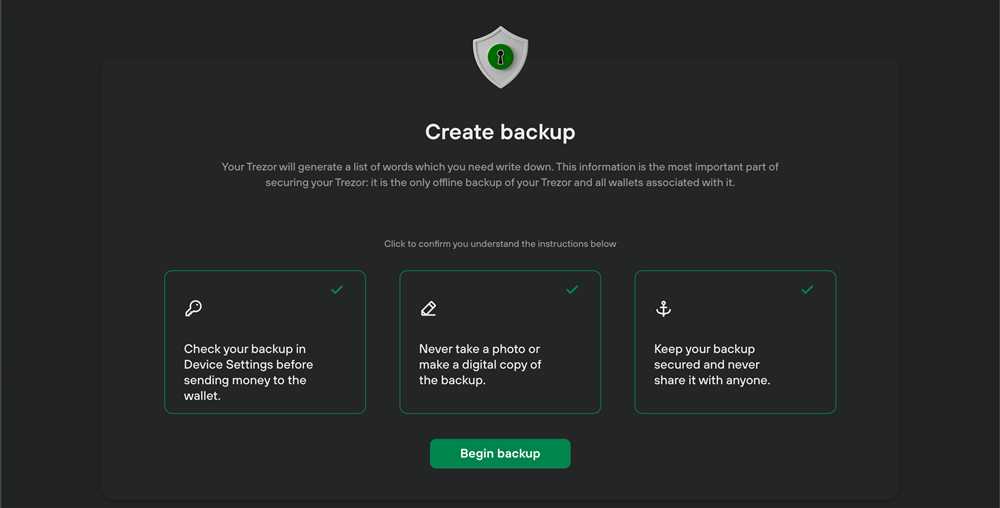
Step 9: Make sure to back up your recovery seed in a safe and secure location.
Step 10: Complete the setup process by following any additional on-screen instructions.
Step 11: You’re now ready to use your TREZOR wallet! Remember to always keep your device and PIN secure.
Note: It is important to double-check the authenticity of the TREZOR website and software before proceeding with the installation process to ensure your device’s security.
Get Started with TREZOR Wallet
Welcome to TREZOR Wallet! This guide will walk you through the setup and installation process, allowing you to start using your TREZOR hardware wallet with ease.
Step 1: Unboxing and Connecting
Before you can get started, you’ll need to unbox your TREZOR hardware wallet and connect it to your computer or mobile device. Use the provided USB cable to connect the device and ensure that it powers on.
Step 2: Installing the Wallet Software
To begin using your TREZOR, you’ll need to install the wallet software on your computer or mobile device. Visit the official TREZOR website or app store to download the appropriate software for your operating system.
Step 3: Setting Up Your Wallet
Once the software is installed, open the TREZOR Wallet application. Follow the on-screen prompts to initialize your wallet and choose a PIN code. Make sure to write down your recovery seed and keep it in a safe place.
During the setup process, you may be prompted to update the firmware of your TREZOR device. Follow the instructions provided to ensure that your device is running the latest version.
Step 4: Adding Accounts and Managing Cryptocurrencies
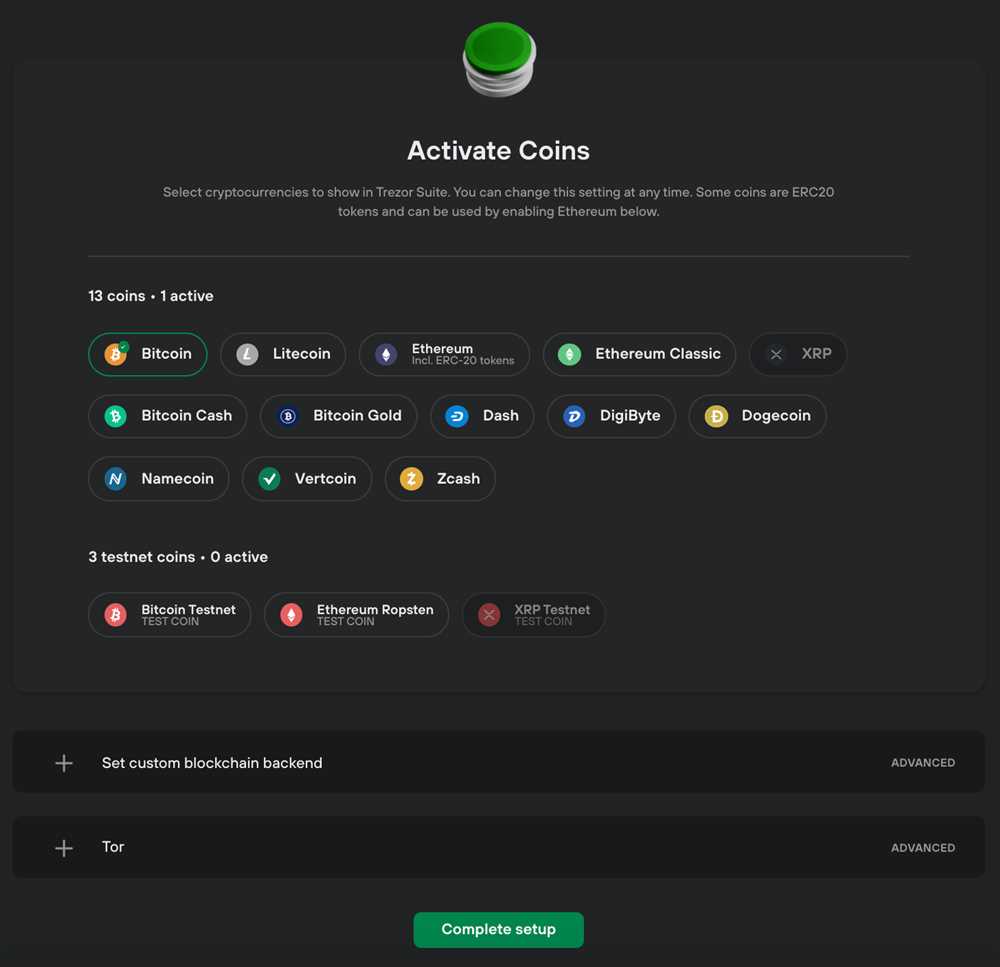
With your wallet set up, you can now add accounts for different cryptocurrencies. Connect your TREZOR and follow the instructions to add accounts for Bitcoin, Ethereum, and other supported cryptocurrencies.
To manage your cryptocurrencies, use the TREZOR Wallet interface to send and receive funds, view transaction history, and access advanced features like coin splitting and labeling.
Remember to always double-check the recipient address before making a transaction and keep your device and recovery seed in a secure location to protect your funds.
Congratulations! You are now ready to start using your TREZOR Wallet to securely manage your cryptocurrencies. If you have any questions or need further assistance, please consult the official TREZOR documentation or support channels.
Complete Guide for Beginners
If you are new to cryptocurrency and looking to set up and install your TREZOR wallet, this complete guide will walk you through the process step by step. Whether you are a beginner or have some experience in the crypto world, this guide is designed to make the setup process as simple and straightforward as possible.
Step 1: Gather the necessary materials
Before getting started, make sure you have the following materials:
- A computer (desktop or laptop) with an internet connection
- A TREZOR hardware wallet
- A USB cable
- The TREZOR Bridge software (available for download on the official TREZOR website)
Step 2: Install the TREZOR Bridge software
To begin the installation process, visit the official TREZOR website and download the TREZOR Bridge software for your operating system (Windows, macOS, or Linux). Once the download is complete, double-click on the installer file and follow the on-screen instructions to install the software on your computer.
Step 3: Connect your TREZOR device
After the TREZOR Bridge software is installed, connect your TREZOR device to your computer using the USB cable. Ensure that your device is powered on and follow any additional instructions that may appear on your screen.
Step 4: Set up your TREZOR wallet
Once your device is connected and recognized by the TREZOR Bridge software, you can now set up your TREZOR wallet:
- Choose a pin code: On the TREZOR device, you will be prompted to choose a pin code. Use the device’s buttons to select the numbers and confirm your pin code.
- Write down the recovery seed: Next, you will be shown a recovery seed on the TREZOR device. Write down the seed on a piece of paper or store it in a safe place. This seed is essential for recovering your wallet in case your device is lost or damaged.
- Confirm the recovery seed: Once you have written down the recovery seed, the TREZOR device will ask you to confirm it by randomly selecting words from the seed. This step ensures that you have noted down the seed correctly.
- Create a wallet name: Lastly, you will be prompted to give your wallet a name. Choose a name that is easy to remember and distinguish from any other wallets you may have.
Step 5: Install the TREZOR Wallet software
Now that your TREZOR device is set up, you can install the TREZOR Wallet software, which allows you to manage your cryptocurrencies:
- Open a web browser and visit the official TREZOR Wallet website.
- Click on the “Download now” button to download the TREZOR Wallet software for your operating system.
- Once the download is complete, double-click on the installer file and follow the on-screen instructions to install the software.
Step 6: Access your TREZOR wallet
Once the TREZOR Wallet software is installed, you can access your wallet by following these steps:
- Connect your TREZOR device to your computer using the USB cable.
- Open the TREZOR Wallet software on your computer.
- Follow the on-screen instructions to unlock and access your wallet using your pin code or recovery seed.
Congratulations! You have successfully set up and installed your TREZOR wallet. Now you can safely store and manage your cryptocurrencies with ease and security.
Remember to always keep your recovery seed secure and never share it with anyone. This seed is the key to accessing your wallet and should be kept offline, preferably in a fireproof and waterproof safe.
Happy crypto journey!
TREZOR Wallet Features
The TREZOR Wallet offers a range of features designed to enhance the security and usability of your cryptocurrency storage. Here are some of the key features:
1. Seed Backup: With TREZOR, you can back up your wallet’s seed phrase offline and keep it secure. This allows you to easily recover your funds in case your device is lost or damaged.
2. Multi-Currency Support: TREZOR supports a wide range of cryptocurrencies, including Bitcoin, Ethereum, Litecoin, and many more. This allows you to manage multiple currencies with a single device.
3. Password Manager: In addition to storing your cryptocurrencies, TREZOR can also securely store your passwords. This feature ensures that your passwords are protected from keylogging or phishing attacks.
4. Two-Factor Authentication (2FA): TREZOR can also be used as a 2FA device, providing an additional layer of security for your online accounts. By using your TREZOR to authenticate, you can protect your accounts from unauthorized access.
5. Secure PIN Protection: Every TREZOR device is protected by a PIN code, preventing unauthorized access. The PIN is entered directly on the device, making it immune to keyloggers and other malware.
6. Easy-to-Use Interface: The TREZOR Wallet provides a user-friendly interface that makes it easy to manage your cryptocurrencies. The device can be connected to your computer or smartphone through a USB cable, offering seamless integration with popular wallets and exchanges.
7. Open Source Software: The software that powers the TREZOR Wallet is open source, meaning it can be independently verified for security. This transparency gives you peace of mind knowing that your funds are protected by trusted and audited code.
These are just a few of the many features that the TREZOR Wallet offers. Whether you’re new to cryptocurrencies or an experienced user, TREZOR provides a secure and convenient solution for managing your digital assets.
Exploring the Key Functions
Once you have set up your TREZOR Wallet, you can start exploring its key functions. This section will guide you through some of the important features and options available on the TREZOR Wallet.
1. Sending and Receiving Cryptocurrencies
The primary function of the TREZOR Wallet is to send and receive cryptocurrencies securely. To send cryptocurrencies, you need to enter the recipient’s address, specify the amount, and confirm the transaction using your TREZOR device. To receive cryptocurrencies, you can generate a unique receiving address by clicking on the “Receive” tab in the wallet interface.
2. Managing Multiple Accounts
TREZOR Wallet allows you to manage multiple accounts conveniently. You can create multiple accounts for different cryptocurrencies or for different purposes. Each account will have its own unique set of addresses and balances, providing increased organization and flexibility in managing your cryptocurrency assets.
3. Viewing Transaction History
You can easily access and view your transaction history on the TREZOR Wallet. By navigating to the “Transactions” tab, you can see a list of all the transactions associated with your accounts. This allows you to keep track of your transaction activity and verify any incoming or outgoing payments.
4. Setting Custom Transaction Fees
With the TREZOR Wallet, you have the option to set custom transaction fees for your cryptocurrency transactions. This gives you control over the speed and cost of your transactions. You can choose between different fee levels to prioritize either speed or cost-effectiveness, depending on your needs and preferences.
5. Accessing Third-party Integrations
TREZOR Wallet supports various third-party integrations, expanding its functionality and compatibility with other services. You can access these integrations through the “Integrations” tab in the wallet interface. Popular integrations include password managers, encrypted messaging services, and decentralized exchanges.
6. Advanced Security Features
TREZOR Wallet is designed with advanced security features to protect your cryptocurrency assets. It utilizes a combination of PIN code protection, recovery seed backups, and encryption to ensure the safety of your private keys. Additionally, you can enable the Passphrase feature to add an extra layer of security to your wallet.
| Key Functions | Description |
|---|---|
| Sending and Receiving Cryptocurrencies | Allows you to securely send and receive cryptocurrencies using your TREZOR device. |
| Managing Multiple Accounts | Enables you to create and manage multiple accounts for different cryptocurrencies or purposes. |
| Viewing Transaction History | Provides a list of all the transactions associated with your accounts for easy tracking and verification. |
| Setting Custom Transaction Fees | Gives you control over the speed and cost of your transactions by allowing you to set custom transaction fees. |
| Accessing Third-party Integrations | Allows you to use various third-party integrations such as password managers and encrypted messaging services. |
| Advanced Security Features | Utilizes advanced security measures, including PIN code protection, recovery seed backups, and encryption. |
Question-answer:
What is TREZOR Wallet?
TREZOR Wallet is a hardware wallet that allows users to securely store their cryptocurrencies. It provides protection against hackers and malware by storing private keys offline.
How do I set up TREZOR Wallet?
To set up TREZOR Wallet, you need to connect your device to a computer or mobile device, install the necessary software, and follow the step-by-step instructions provided by TREZOR. This includes creating a new wallet, setting a strong PIN code, and writing down the recovery seed.
Why is TREZOR Wallet considered secure?
TREZOR Wallet is considered secure because it stores private keys offline in a secure environment. Transactions are signed on the device itself, preventing any exposure of sensitive information. Additionally, it requires physical confirmation on the device for all transactions.
Can I use TREZOR Wallet on multiple devices?
Yes, TREZOR Wallet can be used on multiple devices. However, it is important to note that each device will have its own unique wallet with separate addresses and balances. The devices can be used interchangeably, and all transactions will be reflected in each device’s wallet.
What happens if I lose my TREZOR Wallet device?
If you lose your TREZOR Wallet device, you can recover your funds using the recovery seed you wrote down during the initial setup process. By purchasing a new TREZOR device and entering your recovery seed, you can regain access to your wallet and funds.


