Guide to Sending Solana Tokens to Trezor Solana Wallet
If you are a Solana token holder, you might be wondering how to securely store and manage your tokens. One popular option is to use the Trezor Solana Wallet, a hardware wallet that provides a high level of security for your digital assets. This guide will walk you through the process of transferring your Solana tokens to the Trezor Solana Wallet, ensuring that your tokens are safe and easily accessible.
The first step in transferring your Solana tokens to the Trezor Solana Wallet is to make sure you have the necessary equipment and software. You will need a Trezor hardware wallet, which you can purchase online or from authorized resellers. You will also need a computer or mobile device with the Trezor Bridge software installed.
Once you have the hardware and software ready, you can start the transfer process. Connect your Trezor hardware wallet to your computer or mobile device, and open the Trezor Bridge software. Follow the on-screen instructions to set up your wallet and create a new Solana account.
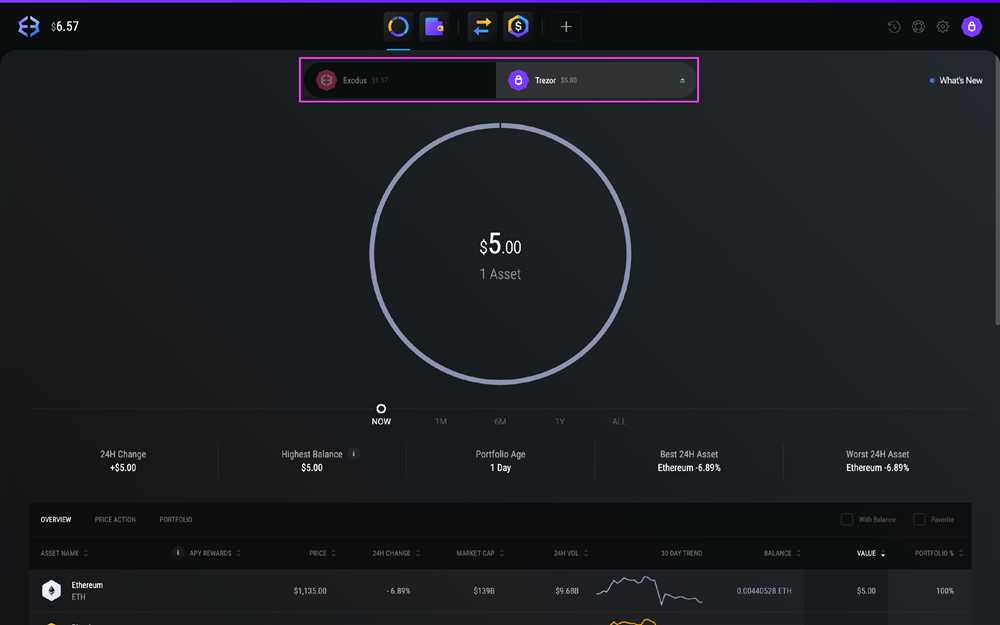
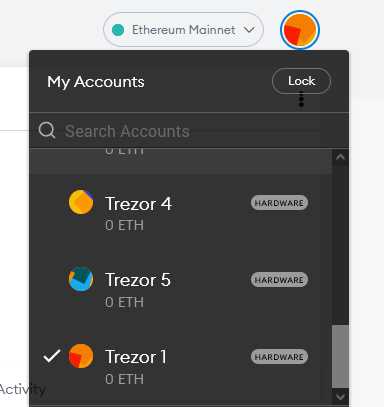
Next, you will need to find your Solana receiving address in the Trezor Solana Wallet. This address is a long string of characters that represents your wallet on the Solana blockchain. To find your address, navigate to the “Receive” section of the Trezor Solana Wallet and copy the address provided.
Finally, you can initiate the transfer of your Solana tokens from your current wallet or exchange to your Trezor Solana Wallet. During the transfer process, you will be asked to input the receiving address that you copied earlier. Follow the instructions provided by your current wallet or exchange to complete the transfer.
Once the transfer is complete, you can view your Solana tokens in the Trezor Solana Wallet. You can also use the Trezor Solana Wallet to send your tokens to other addresses or interact with decentralized applications on the Solana blockchain. Remember to always double-check the receiving address before initiating any transactions to ensure the safety of your tokens.
In conclusion, transferring your Solana tokens to the Trezor Solana Wallet is a simple and secure process that allows you to take full control of your digital assets. By following these steps, you can enjoy the peace of mind that comes with knowing your tokens are protected by the high-level security provided by the Trezor hardware wallet.
Why Transfer Solana Tokens?
There are several reasons why you might want to transfer your Solana tokens to a Trezor Solana wallet:
| 1 | Security: By transferring your tokens to a Trezor Solana wallet, you can ensure that your assets are securely stored in a hardware wallet, which offers enhanced protection against hacks and theft. |
| 2 | Peace of mind: Storing your tokens in a hardware wallet adds an extra layer of security, giving you peace of mind knowing that your assets are safe and protected. |
| 3 | Accessibility: By transferring your tokens to a Trezor Solana wallet, you can easily access and manage your assets anytime, anywhere, as long as you have your hardware wallet and an internet connection. |
| 4 | Convenience: Using a hardware wallet like Trezor Solana allows for a seamless and user-friendly experience when it comes to managing your Solana tokens. You can easily track, send, and receive your tokens through the secure interface provided by the hardware wallet. |
| 5 | Long-term storage: If you are planning to hold onto your Solana tokens for an extended period, transferring them to a hardware wallet provides a reliable and secure long-term storage solution. |
Overall, transferring your Solana tokens to a Trezor Solana wallet offers numerous benefits, including enhanced security, peace of mind, accessibility, convenience, and long-term storage. It is a recommended practice for anyone looking to safeguard their Solana assets.
Advantages of Transferring Solana Tokens
Transferring Solana tokens to your Trezor Solana wallet has several advantages:
1. Increased Security:
By transferring your Solana tokens to a hardware wallet like Trezor, you enhance the security of your assets. Hardware wallets store your private keys offline, making it nearly impossible for hackers to gain access to your funds.
2. Peace of Mind:
With your Solana tokens stored in a secure hardware wallet, you can have peace of mind knowing that your funds are protected. You can confidently carry out transactions and hold your tokens without worrying about potential security breaches.
3. Compatibility:
The Trezor Solana wallet is compatible with various Solana tokens, including SPL tokens. This makes it easy for you to manage different types of tokens within a single wallet, simplifying your token management process.
4. User-Friendly Interface:

Trezor Solana wallet offers a user-friendly interface that allows you to easily access and manage your Solana tokens. The wallet provides clear and intuitive navigation, making it simple for both beginners and experienced users to transfer, receive, and track their Solana tokens.
5. Backup and Recovery:
Trezor wallets offer backup and recovery options, ensuring that you can easily restore your wallet and access your Solana tokens if your hardware wallet is lost, stolen, or damaged. This backup feature provides an extra layer of protection and convenience for managing your tokens.
Overall, transferring your Solana tokens to a Trezor Solana wallet offers enhanced security, peace of mind, compatibility with various tokens, a user-friendly interface, and backup options for a seamless and secure token management experience.
Step-by-Step Guide on Transfer Process
Transferring Solana tokens to your Trezor Solana wallet is a simple process that can be completed in a few easy steps. This guide will walk you through the process, ensuring a smooth and secure transfer.
Step 1: Set up your Trezor Solana Wallet
Before you can transfer Solana tokens to your Trezor wallet, you need to set it up. Follow these steps to create your Trezor Solana wallet:
- Connect your Trezor device to your computer and open the Trezor Wallet website.
- Select the option to create a new wallet and choose Solana as the cryptocurrency.
- Follow the on-screen instructions to set a strong password and create a backup of your wallet.
- Once your wallet is set up, note down the Solana address associated with it. This is where you will send your Solana tokens.
Step 2: Access your Solana tokens
In order to transfer your Solana tokens, you need to have them in a wallet or exchange account. Follow these steps to access your Solana tokens:
- Open your current Solana wallet or exchange account.
- Locate the Solana tokens you wish to transfer.
- Ensure that you have enough tokens in your account to cover any transfer fees that may be incurred.
Step 3: Initiate the transfer
Now that you have your Trezor Solana wallet set up and your Solana tokens ready, you can initiate the transfer. Follow these steps:
- Open your Trezor Solana wallet on the Trezor Wallet website.
- Click on the “Receive” button to display your Solana wallet address.
- Copy the Solana wallet address.
- Return to your current Solana wallet or exchange account.
- Initiate a withdrawal or transfer of your Solana tokens.
- Paste the Trezor Solana wallet address in the recipient address field.
- Double-check that the address is correct and confirm the transaction.
Step 4: Verify the transfer
After initiating the transfer, it is important to verify that the Solana tokens have been successfully transferred to your Trezor wallet. Follow these steps to verify the transfer:
- Return to your Trezor Solana wallet on the Trezor Wallet website.
- Click on the “Transactions” tab.
- Look for the transaction corresponding to your transfer.
- Verify that the transaction status is “completed” or “successful”.
- If the transaction status is not “completed” or “successful”, contact customer support for assistance.
Following these step-by-step instructions will ensure a seamless transfer of your Solana tokens to your Trezor Solana wallet. Remember to always be cautious when transferring cryptocurrency and double-check all addresses before confirming a transaction.
Creating a Trezor Solana Wallet
To transfer Solana tokens to a Trezor hardware wallet, you need to first create a Solana wallet on your Trezor device. Here are the steps to do so:
- Make sure your Trezor device is connected to your computer.
- Go to the Trezor website and select the Solana app from the list of available apps.
- Open the Solana app on your Trezor device.
- On your computer, you will see a prompt asking you to allow the Trezor device to connect to the Solana app. Confirm the connection.
- Once the connection is established, you will see the Solana wallet interface on your computer screen.
- Follow the on-screen instructions to set up a new Solana wallet. This typically involves choosing a PIN code and writing down the recovery seed phrase.
- Once your wallet is set up, you will be able to see your Solana wallet address on the screen.
- Copy your Solana wallet address and use it to send Solana tokens from your exchange or other wallet.
- Confirm the transaction and wait for the tokens to be transferred to your Trezor Solana wallet.
Creating a Trezor Solana wallet ensures that your Solana tokens are stored in a secure, offline hardware wallet, providing an extra layer of protection for your funds.
Initializing the Wallet on Solana Network
Before you can transfer Solana tokens to your Trezor Solana wallet, you need to initialize the wallet on the Solana network. This process involves setting up a new wallet and generating a seed phrase that will be used to access your wallet in the future.
Step 1: Access Solana Wallet
To start, go to the official Solana website and look for the Solana wallet. Click on the link to access the wallet interface.
Step 2: Create New Wallet
Once you have accessed the Solana wallet interface, choose the option to create a new wallet. This will initiate the process of generating a new wallet address and seed phrase.
Follow the on-screen instructions to set up a new wallet. You may need to provide a secure password to protect your wallet.
Step 3: Write Down Seed Phrase
After creating your new wallet, you will be presented with a seed phrase. This phrase is crucial for accessing your wallet in the future, so it is important to write it down in a safe and secure place. Make sure to store your seed phrase in multiple locations to minimize the risk of loss or theft.
Remember, anyone with access to your seed phrase can gain control over your wallet and its associated funds. Treat your seed phrase with the same level of security as you would treat your private keys.
Step 4: Confirm Seed Phrase
As an additional security measure, the Solana wallet will ask you to confirm your seed phrase. This ensures that you have written down the phrase correctly and can access your wallet in the future.
Take the time to carefully enter each word of your seed phrase in the correct order. Once you have confirmed the seed phrase, your wallet will be successfully initialized on the Solana network.
It is recommended to double-check your seed phrase and confirm its accuracy before proceeding to transfer any tokens to your Trezor Solana wallet.
Withdrawing Solana Tokens from the Existing Wallet
Transferring Solana tokens from your existing wallet to your Trezor Solana wallet is a simple and straightforward process. Follow the steps below to complete the withdrawal:
Step 1: Open your existing Solana wallet
Launch the Solana wallet application or access your Solana wallet using your preferred method (such as a web-based wallet or a hardware wallet).
Step 2: Locate and select the token you want to withdraw
In your existing Solana wallet, navigate to the tokens section or the specific token you wish to withdraw. Make sure you have sufficient funds available in that token to complete the withdrawal.
Step 3: Initiate the withdrawal
Look for a “Withdraw” or “Send” option in your wallet interface and select it. This will prompt you to enter the recipient’s wallet address and the amount of tokens you wish to withdraw.
Step 4: Enter the recipient wallet address
Copy the Trezor Solana wallet’s address or scan its QR code and paste it as the recipient’s address in your existing wallet interface. Double-check the address to ensure it is accurate and belongs to your Trezor Solana wallet.
Step 5: Enter the withdrawal amount
Specify the amount of tokens you want to withdraw from your existing wallet. Take note of any transaction fees that may apply, as they will be deducted from the withdrawal amount. Ensure you have enough funds to cover the withdrawal and any associated fees.
Step 6: Confirm the withdrawal
Review the withdrawal details, including the recipient’s address and the withdrawal amount, before confirming the transaction. Once you are satisfied with the information, proceed to confirm the withdrawal.
Step 7: Wait for the transaction to be processed

After confirming the withdrawal, your existing Solana wallet will initiate the transfer of tokens to your Trezor Solana wallet. The transaction may take a few minutes to be processed and confirmed on the Solana blockchain.
Once the transaction is confirmed, you will be able to see the transferred tokens in your Trezor Solana wallet. It is advised to verify the transaction on the Solana blockchain explorer to ensure its completion.
Note: Make sure to keep your wallet credentials and private keys safe throughout the withdrawal process.
Q&A:
Can I transfer Solana tokens to the Trezor Solana wallet?
Yes, you can transfer Solana tokens to the Trezor Solana wallet. The wallet supports Solana and allows you to securely store and manage your Solana tokens.