
Backing up Your Trezor Wallet – A Step-by-Step Guide to Safeguarding Your Funds
Welcome to the world of cryptocurrency, where innovation and security go hand in hand. As a proud owner of a Trezor wallet, you have taken a crucial step towards securing your digital assets. However, it is essential to remember that even the most reliable technology can have its vulnerabilities. That’s why it is vital to create backups of your Trezor wallet to ensure the safety of your funds.
Backing up your Trezor wallet is like creating a safety net for your digital wealth. It allows you to recover your funds in case of a hardware failure, loss, theft, or any unfortunate event. In this step-by-step guide, we will walk you through the process of backing up your Trezor wallet, ensuring that your funds are protected and accessible at all times.
Step 1: Familiarize yourself with the backup process
The first step is to understand how the backup process works. Your Trezor wallet generates a recovery seed, which is a random combination of 12, 18, or 24 words. These words serve as your backup and can be used to restore your wallet on any compatible device. It is crucial to keep your recovery seed secure and confidential, as anyone who gains access to it can potentially steal your funds.
Note: It is recommended to write down your recovery seed manually rather than storing it digitally. This reduces the risk of it being compromised by malware or hackers.
Step 2: Prepare a secure storage
Now that you understand the importance of the recovery seed, it’s time to prepare a secure storage for it. Consider using a durable material like stainless steel or fireproof paper to protect your recovery seed from physical damage. Avoid using online or cloud storage, as they can be susceptible to breaches. Instead, opt for a safe deposit box, a personal safe, or any other secure physical location.
Note: Make sure to store your recovery seed separately from your Trezor wallet to minimize the risk of both being compromised simultaneously.
Step 3: Generate and verify your recovery seed
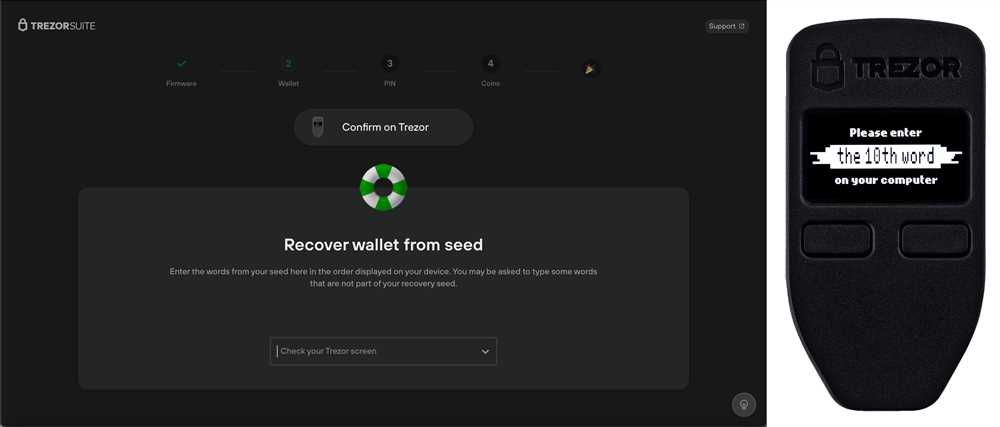
With your secure storage ready, it’s time to generate and verify your recovery seed. Connect your Trezor wallet to a trusted device and follow the on-screen instructions to initiate the backup process. Once generated, your Trezor device will display a series of words. Write these words down in the exact order. After the completion, the device will prompt you to verify your recovery seed by displaying random words from your backup. Make sure to verify each word accurately before proceeding.
Note: During the backup process, ensure that no one is watching your screen or camera to prevent potential security breaches.
Step 4: Store your recovery seed securely
Now that you have generated and verified your recovery seed, it’s time to store it securely. Remember not to store it digitally, as it can be vulnerable to cyber attacks. Instead, keep your recovery seed in the secure storage you prepared in step 2. Additionally, consider making multiple copies and storing them in separate physical locations. This provides an extra layer of protection and ensures that you can still access your funds even if one copy is lost or damaged.
Congratulations! You have successfully backed up your Trezor wallet and taken a significant step towards safeguarding your funds. Remember to regularly test your recovery seed by restoring your wallet on a compatible device to ensure that it is functioning correctly. By following these steps, you can have peace of mind knowing that your digital assets are secure, even in the face of unexpected events.
Why Backing Up Your Trezor Wallet is Crucial for Keeping Your Funds Safe
When it comes to storing your cryptocurrency safely, one of the most important steps you can take is backing up your Trezor wallet. By creating a backup of your wallet, you are ensuring that even if something were to happen to your device, you still have access to your funds.
There are several reasons why backing up your Trezor wallet is crucial for keeping your funds safe:
|
Hardware Failure: Your Trezor wallet is a physical device that can get damaged or stop working over time. By having a backup, you can easily recover your funds onto a new device without any hassle. |
|
Theft or Loss: If your Trezor wallet gets stolen or lost, having a backup ensures that you can still access your funds. Without a backup, you may lose all your cryptocurrency forever. |
|
Human Error: Mistakes can happen, and it is not uncommon for people to accidentally delete or format their Trezor wallets. By having a backup, you can easily restore your wallet and regain access to your funds. |
Creating a backup of your Trezor wallet is a simple process. Just follow these steps:
- Connect your Trezor wallet to your computer and open the Trezor Bridge software.
- Enter your PIN and passphrase (if enabled) to unlock your device.
- Click on the “Back up” tab in the Trezor Bridge software.
- Follow the instructions on the screen to create a new backup.
- Make sure to securely store your backup in a safe place, preferably offline.
Remember, the safety of your cryptocurrency funds depends on your ability to protect your Trezor wallet. By backing up your wallet, you are taking a crucial step towards ensuring the security and accessibility of your funds, even in the face of unforeseen circumstances.
Understanding the Risks of Losing Your Private Key
When it comes to safeguarding your funds in your Trezor wallet, one of the most important factors to consider is the security of your private key. Your private key is a unique and essential piece of information that allows you to access your funds and make transactions.
If you lose your private key, you will lose access to your funds permanently. There is no way to recover a lost private key, which means that any funds stored in your wallet will be lost forever.
There are several risks associated with losing your private key:
1. Irreversible Loss of Funds
Losing your private key means losing your funds. Once your private key is lost, you will not be able to access or retrieve your funds in any way. This can be financially devastating, especially if you have a significant amount of funds stored in your wallet.
2. Limited Recovery Options
If you lose your private key, you will have limited options for recovering your funds. Unlike traditional banks or financial institutions, cryptocurrency wallets do not have a central authority that can help you recover your private key or access your funds.
One option you may have is to attempt to use a recovery seed, which is a backup of your private key. However, this process is complex and may not always be successful.
3. Vulnerability to Hacking and Theft
Without a private key, your funds are vulnerable to hacking and theft. If a hacker gains access to your private key, they can easily transfer your funds to their own wallets, leaving you with no recourse.
- Always keep your private key secure and never share it with anyone.
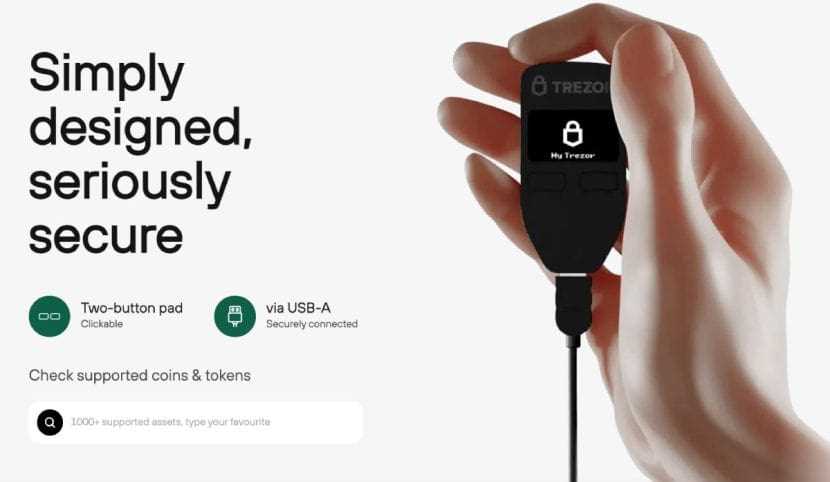
- Consider using a hardware wallet, such as Trezor, which provides an additional layer of security for your private key.
By understanding the risks associated with losing your private key, you can take the necessary steps to prevent this from happening. Backup your private key securely and consider implementing additional security measures to protect your funds.
A Step-by-Step Guide to Creating a Backup of Your Trezor Wallet
Keeping a backup of your Trezor wallet is crucial to ensuring the safety of your funds. By creating a backup, you can restore your wallet and access your funds even if your device is lost, stolen, or damaged. Follow these step-by-step instructions to create a backup of your Trezor wallet:
Step 1: Connect your Trezor device
Begin by connecting your Trezor device to your computer using the USB cable provided. Make sure your computer is connected to the internet and has the Trezor Bridge software installed.
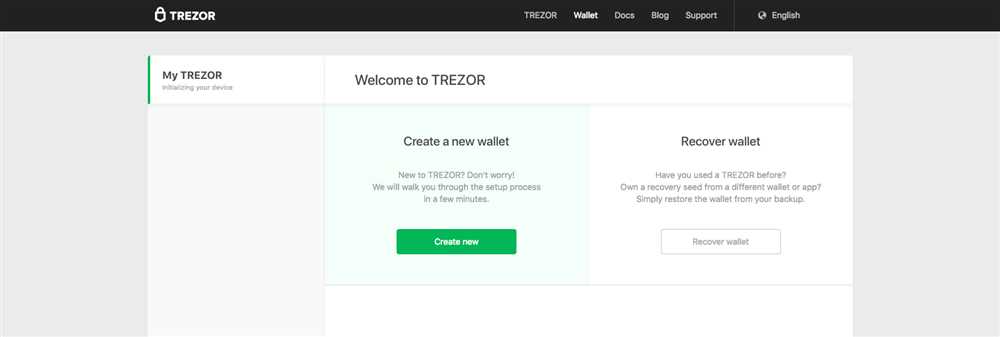
Step 2: Launch the Trezor Wallet interface
Open your preferred web browser and go to wallet.trezor.io. Click on “Connect Trezor” to launch the Trezor Wallet interface.
Step 3: Enter your PIN
On the Trezor device, enter your PIN using the device’s touchscreen. Make sure to enter it correctly to proceed with the wallet setup.
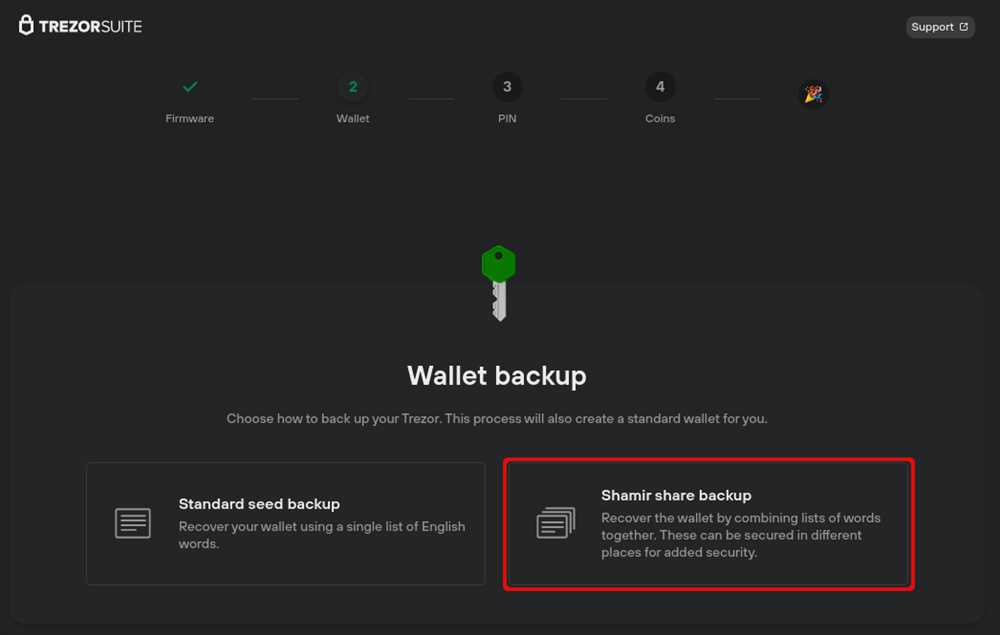
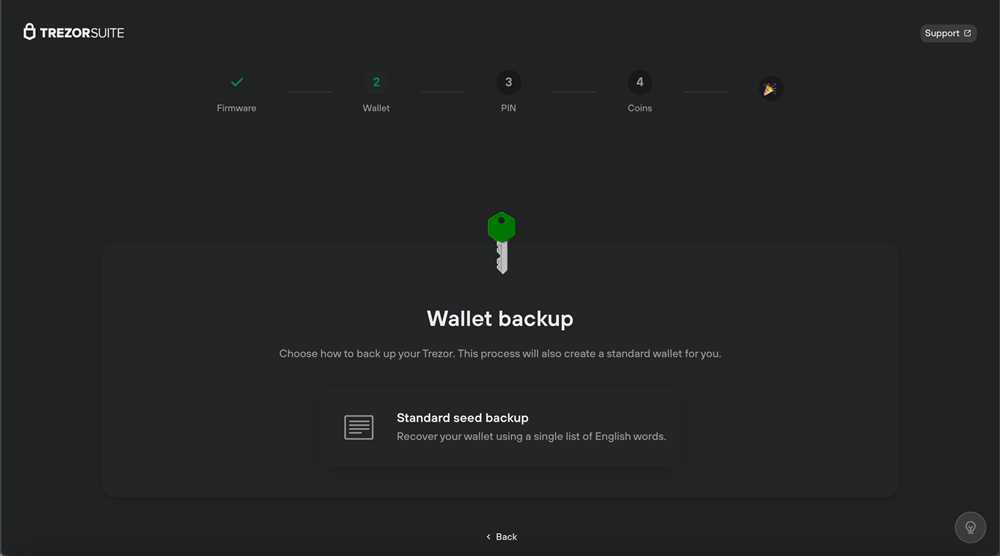
Step 4: Access the backup settings
In the Trezor Wallet interface, click on the “Settings” tab located at the top right corner of the screen. Then, click on “Backup” from the dropdown menu.
Step 5: Start the backup process
Click on the “Start” button to begin the backup process. The wallet will prompt you to confirm your intention to create a backup.
Step 6: Write down your recovery seed
A list of 24 words will be displayed on the Trezor device’s screen. Write down these words in the exact order they are presented. Make sure to write them on a piece of paper and keep it in a safe and secure location.
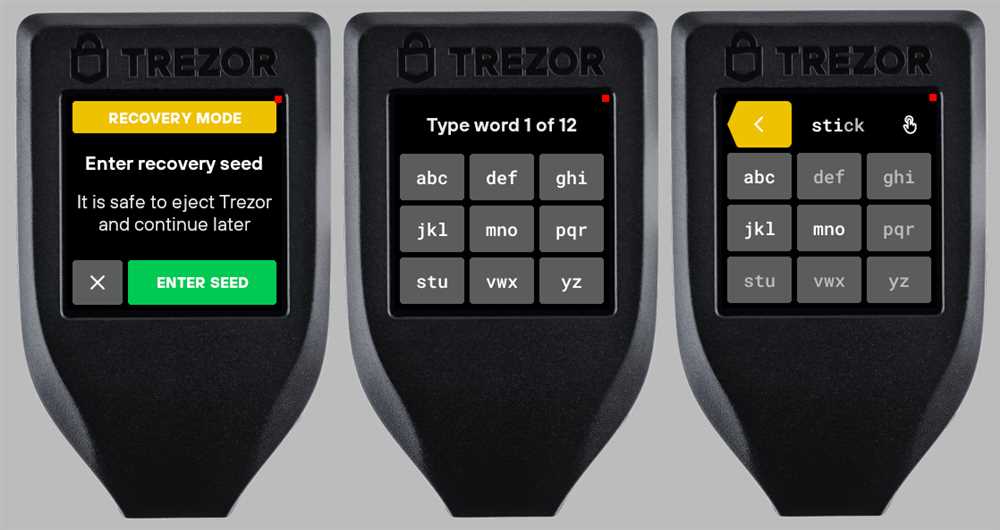
Step 7: Confirm your recovery seed
Once you have written down the recovery seed, the Trezor device will prompt you to confirm it. Select the words from the displayed list in the same order as they were presented and confirm your recovery seed.
Step 8: Complete the backup process
After confirming your recovery seed, the Trezor Wallet interface will display a confirmation message. Your backup is now complete, and you have successfully safeguarded your funds.
Step 9: Store your backup securely
It is crucial to store your backup securely to protect against loss or theft. Consider using a fireproof and waterproof safe or a safety deposit box for maximum security.
Step 10: Test your backup
It is recommended to test your backup by recovering your wallet on a separate Trezor device or a compatible software wallet. This will ensure that your backup is valid and that you can successfully restore your wallet if needed.
By following these step-by-step instructions, you have taken the necessary precautions to create a backup of your Trezor wallet and protect your funds. Remember to regularly update and test your backup to stay prepared for any unforeseen circumstances.
Storing Your Backup Offline: Best Practices for Enhanced Security
Backing up your Trezor wallet is essential to protect your funds from loss or theft. While keeping a backup of your wallet is important, it’s equally important to store that backup in a secure manner. One highly recommended method is to store your backup offline, away from potential online threats. Here are some best practices for enhanced security:
1. Use Hardware Wallets:
Consider using a hardware wallet, such as Trezor, to store and manage your cryptocurrencies. Hardware wallets store your private keys offline, making it difficult for hackers to access them. By keeping your backup offline in a hardware wallet, you reduce the risk of being exposed to online vulnerabilities.
2. Encrypt Your Backup:
Before storing your backup offline, encrypt it with a strong password. Encryption adds an extra layer of security, ensuring that even if someone gains physical access to your backup, they won’t be able to access your funds without the password.
3. Store in Multiple Locations:
Consider storing your offline backup in multiple physical locations. This protects your funds in case of natural disasters, theft, or loss of the backup. Distributing your backup across multiple secure locations reduces the risk of losing your funds due to a single event.
4. Choose a Secure Storage Medium:
When storing your backup offline, choose a secure storage medium. This can include hardware devices like USB drives or external hard drives, or even physical media like paper wallets. Ensure that the chosen storage medium is resistant to damage and has a long lifespan.
5. Keep Your Backup Updated:
Regularly update your offline backup to ensure it reflects the most recent state of your wallet. This is especially important when you make any changes to your wallet, such as adding new accounts or receiving/sending funds. This way, you can always restore your wallet to its most recent state if needed.
6. Use a Secure Location:
Select a secure and discreet location to store your offline backup. This can be a safe at home, a bank deposit box, or any other place that provides physical security. Choose a location that is protected from theft, fire, and other potential risks.
Remember, the security of your funds is in your hands. By following these best practices and storing your backup offline, you can enhance the security of your Trezor wallet and safeguard your funds from potential threats.
Regularly Updating Your Backup: Ensuring the Safety of Your Funds
Once you have successfully backed up your Trezor wallet, it is crucial to regularly update your backup to ensure the safety of your funds. By keeping your backup up-to-date, you can protect your digital assets from unexpected events such as device loss, damage, or theft.
Here are a few steps to help you regularly update your backup:
1. Choose a Backup Schedule:
Decide how frequently you want to update your backup. It is recommended to update your backup whenever there are significant changes to your wallet, such as adding or removing accounts, or generating new addresses. Consider setting a monthly or quarterly schedule to ensure you don’t forget.
2. Disconnect Your Trezor Device:
Before updating your backup, disconnect your Trezor device from your computer. This step is essential to prevent any potential security risks during the backup process.
3. Access Your Wallet Using Recovery Seed:
To update your backup, you will need to access your wallet using the recovery seed. Make sure you have your recovery seed stored in a safe and secure location.
4. Verify Wallet Settings:
Once you have accessed your wallet using the recovery seed, verify that your wallet settings are correct and up-to-date. Double-check the accounts, addresses, and any other relevant information.
5. Generate a New Backup:
Generate a new backup of your wallet using the updated information. Follow the same process as when you initially backed up your wallet. Ensure that the backup is stored securely in multiple locations, such as external hard drives, USB drives, or encrypted cloud storage.
6. Test the Backup:
After creating the new backup, it is important to test its integrity. Use another device or computer to restore your wallet using the backup file. Verify that all your accounts, balances, and transaction history are correctly restored.
7. Update Backup Storage Locations:
Regularly review and update the storage locations of your backup files. Consider diversifying your storage options to minimize the risk of data loss due to physical damage, fire, or theft. Storing backups in multiple secure locations ensures redundancy and provides additional protection.
8. Keep Your Backup Confidential:
Always keep your backup files confidential. Store them in locations that are inaccessible to unauthorized individuals. Use encryption and password protection to secure the backup files, adding an extra layer of security.
By regularly updating your backup and following these steps, you can ensure the safety of your funds stored in your Trezor wallet. Remember, it is better to be proactive and take preventive measures than to face the potential loss of your digital assets.
Note: This guide is intended for informational purposes only and should not be considered as financial or investment advice. Always do your own research and consult relevant professionals before making any investment decisions.
Q&A:
Why is it important to backup my Trezor wallet?
Backing up your Trezor wallet is important because it ensures that even if your device is lost, stolen, or damaged, you will still be able to access and recover your funds. Without a backup, you could potentially lose all of your cryptocurrency holdings.


