
A Step-by-Step Guide to Using Trezor.com for Secure Bitcoin Transactions
Welcome to the ultimate guide to using Trezor, the most secure hardware wallet, for your Bitcoin transactions. If you are serious about keeping your Bitcoins safe from hackers and other security threats, then Trezor is the perfect solution for you. With its state-of-the-art security features and user-friendly interface, Trezor ensures that your digital assets remain secure at all times.
But how exactly does Trezor work? In this step-by-step guide, we will walk you through the process of setting up your Trezor wallet, transferring your Bitcoins to the wallet, and making secure transactions. Whether you are a beginner or an experienced user, this guide is designed to provide you with all the information you need to confidently use Trezor for your Bitcoin transactions.
Step 1: Setting up Your Trezor Wallet
The first step in using Trezor is setting up your wallet. Start by connecting your Trezor device to your computer and navigating to the official website. Follow the instructions to install the necessary software and firmware updates. Once the setup is complete, you will be prompted to create a new wallet. Make sure to choose a strong and unique password to protect your wallet from unauthorized access.
Step 2: Transferring Your Bitcoins
Now that your wallet is set up, it’s time to transfer your Bitcoins to your Trezor wallet. To do this, open your preferred Bitcoin exchange or wallet and initiate a withdrawal to your Trezor wallet address. Follow the provided instructions and confirm the transaction. It may take some time for the transaction to be processed and for the Bitcoins to appear in your Trezor wallet.
Step 3: Making Secure Transactions
With your Bitcoins safely stored in your Trezor wallet, you can now make secure transactions. Connect your Trezor device to your computer and open the Trezor wallet software. Enter your password and select the account from which you wish to send the Bitcoins. Enter the recipient’s address and the amount you want to send. Verify all the details and confirm the transaction. Your Trezor device will display the transaction details for you to review and approve before it is broadcasted to the Bitcoin network.
By following these simple steps, you can now confidently use your Trezor hardware wallet to securely manage your Bitcoin transactions. Remember to always keep your Trezor device up to date with the latest firmware and to write down and store your recovery seed in a safe place. With Trezor, you can have peace of mind knowing that your Bitcoins are protected by the highest level of security in the crypto world.
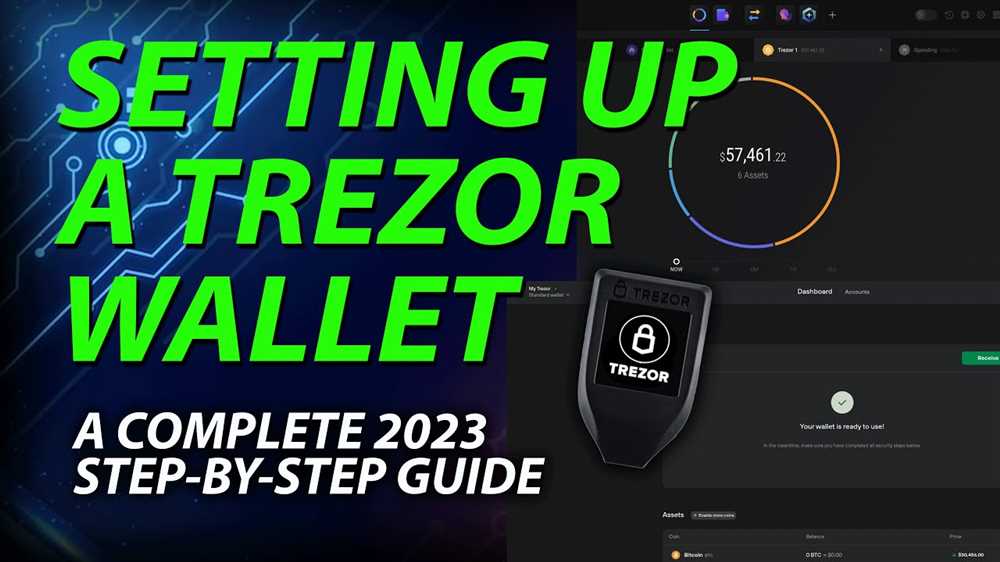
Setting Up Your Trezor Wallet
Before you start using your Trezor hardware wallet, you’ll need to set it up. Follow these steps to get started:
- First, make sure you have a computer or mobile device with internet access.
- Connect your Trezor device to your computer or mobile device using the USB cable.
- Visit the official Trezor website and download the Trezor Bridge software.
- Install the Trezor Bridge software on your computer or mobile device.
- After the installation is complete, open the Trezor Wallet page in your web browser.
- Click on the “Create a New Wallet” button to start the setup process.
- Choose a unique and secure passphrase for your wallet. Make sure to remember it as it will be required to access your funds.
- Follow the on-screen instructions to complete the wallet setup. This may involve creating a backup of your recovery seed and verifying it.
- Once the setup is complete, you can now securely store and manage your Bitcoin using your Trezor hardware wallet.
Remember to keep your recovery seed and passphrase in a safe and secure location. These are essential for recovering your wallet in case of loss or damage to your Trezor device.
Creating a New Bitcoin Wallet
Before you can start using your Trezor device for secure Bitcoin transactions, you’ll need to create a new Bitcoin wallet. Follow these steps to get started:
- Connect your Trezor device to your computer using the USB cable.
- Go to the official Trezor website and download the Trezor Bridge software.
- Install the Trezor Bridge software on your computer.
- Once the installation is complete, open the software and follow the on-screen instructions to set up your device.
- Choose a PIN code for your Trezor device. Make sure it’s unique and easy for you to remember, but difficult for others to guess.
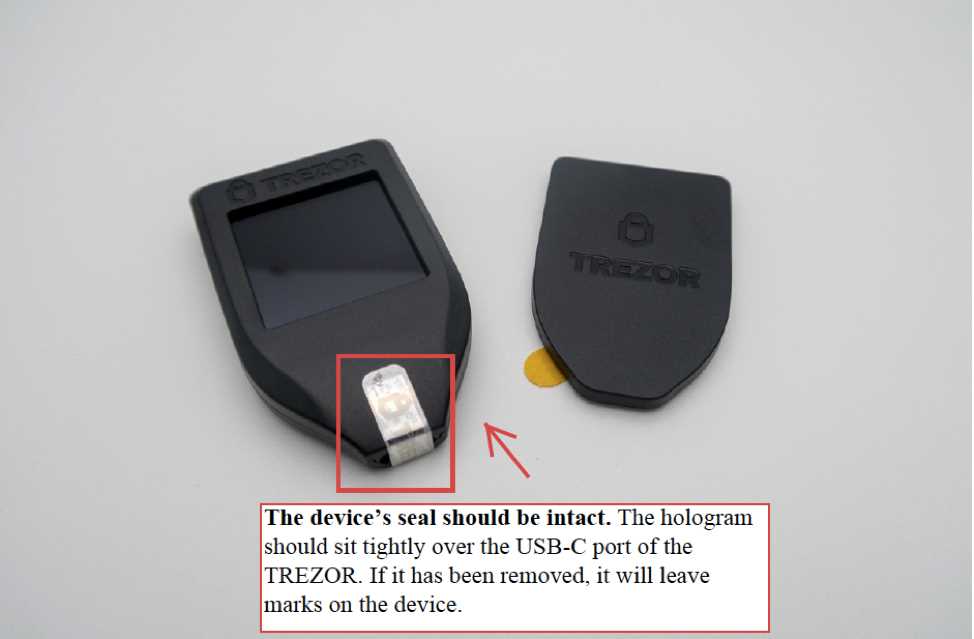
- Write down the recovery seed provided by the Trezor device. This seed is extremely important as it can be used to recover your Bitcoin wallet in case your device gets lost or damaged.
- Confirm the recovery seed by entering the words in the correct order on the Trezor device.
- Set a strong passphrase for your Bitcoin wallet. This passphrase adds an extra layer of security to your wallet.
- Your new Bitcoin wallet is now ready to use with your Trezor device. Make sure to keep your recovery seed and passphrase in a safe and secure location.
Congratulations! You have successfully created a new Bitcoin wallet using your Trezor device. Now you can securely send, receive, and store your Bitcoins without worrying about the safety of your private keys.
Transferring Bitcoin to Your Trezor Wallet
Once you have set up your Trezor wallet and generated a receiving address, you can proceed to transfer Bitcoin to your wallet for safe storage. Follow these steps to transfer Bitcoin to your Trezor wallet:
- Access your existing Bitcoin wallet: Use your preferred Bitcoin wallet provider or software to access your Bitcoin holdings. Make sure you have sufficient funds available for transfer.
- Initiate the transfer: Find the option to send or withdraw Bitcoin from your current wallet. This will typically require you to input the destination address for the transfer.
- Copy the Trezor address: In your Trezor wallet, navigate to the “Receive” tab and select the appropriate account. Copy the receiving address to your clipboard.
- Paste the address: Return to your current wallet and paste the Trezor address as the destination for the transfer. Double-check that the address is correct to avoid any errors.
- Specify the amount: Enter the amount of Bitcoin you want to transfer to your Trezor wallet. Be cautious and enter the correct amount to avoid potential loss of funds.
- Confirm the transaction: Review the transaction details and fees, if any, provided by your current wallet. Once you are satisfied, confirm the transfer and proceed with any necessary authentication or verification steps.
- Wait for confirmation: After submitting the transfer, you will need to wait for the Bitcoin network to confirm the transaction. This can take some time, depending on network congestion.
- Check your Trezor wallet: Once the transaction is confirmed, check your Trezor wallet to ensure that the transferred Bitcoin has successfully arrived.
Note: It is essential to double-check the receiving address and the amount before confirming the transfer. Bitcoin transactions are irreversible, and any mistakes may result in the loss of funds.
By transferring your Bitcoin to your Trezor wallet, you can benefit from its enhanced security features and keep your funds safe from potential threats.
Q&A:
What is Trezor?
Trezor is a hardware wallet that stores your bitcoin and other cryptocurrencies securely offline.
How does Trezor keep my bitcoin secure?
Trezor keeps your bitcoin secure by storing your private keys offline and requiring a physical button press to confirm transactions.
Can I use Trezor with any bitcoin wallet?
Trezor is compatible with a wide range of bitcoin wallets, including popular options like Electrum and Mycelium.
Is it easy to set up and use Trezor?
Yes, setting up Trezor is a straightforward process that involves connecting the device to your computer and following the on-screen instructions.
What should I do if I lose my Trezor device?
If you lose your Trezor device, you can use your recovery seed to restore your wallet on a new device. It is important to keep your recovery seed in a safe and secure location.


