How to Transfer Your Crypto to the Trezor Wallet: A Detailed Guide
If you are a crypto enthusiast and looking for a safe and easy way to store your digital assets, then you need to transfer them to the Trezor Wallet. With its secure hardware design and user-friendly interface, Trezor Wallet is the ultimate solution for safeguarding your cryptocurrency.
Step 1: Setting Up Your Trezor Wallet
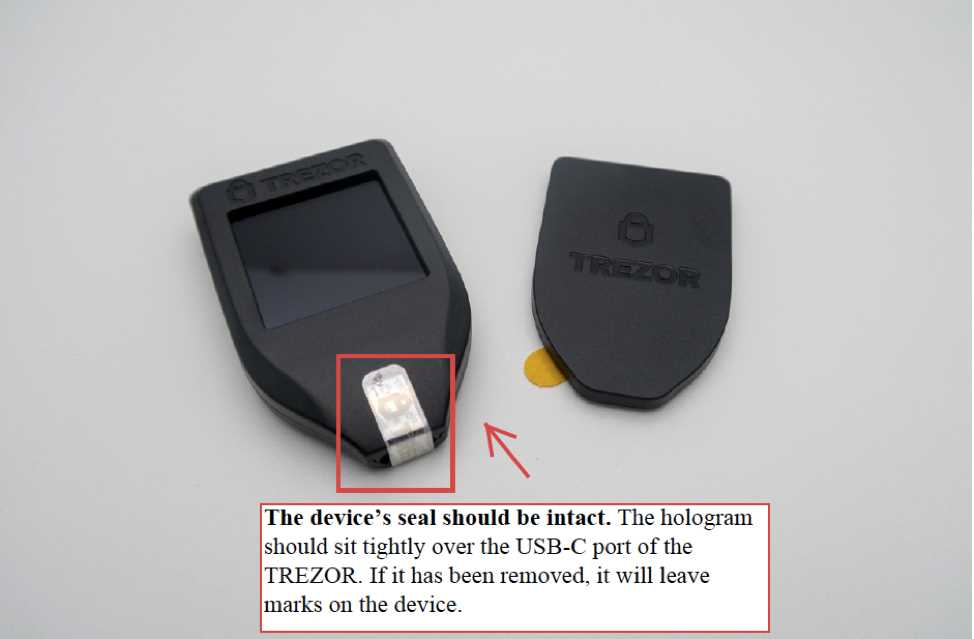
The first step is to set up your Trezor Wallet. Connect your Trezor hardware wallet to your computer or mobile device and follow the instructions on the screen to complete the setup process. Make sure to write down and securely store your recovery seed, as it will be needed to restore your wallet in case of loss or damage.
Step 2: Installing Trezor Bridge
Next, you need to install Trezor Bridge, which is a communication software that allows your Trezor device to connect with the Trezor Wallet interface. Visit the official Trezor website and download the appropriate version of Trezor Bridge for your operating system. Follow the installation instructions to complete the process.
Step 3: Accessing the Trezor Wallet Interface
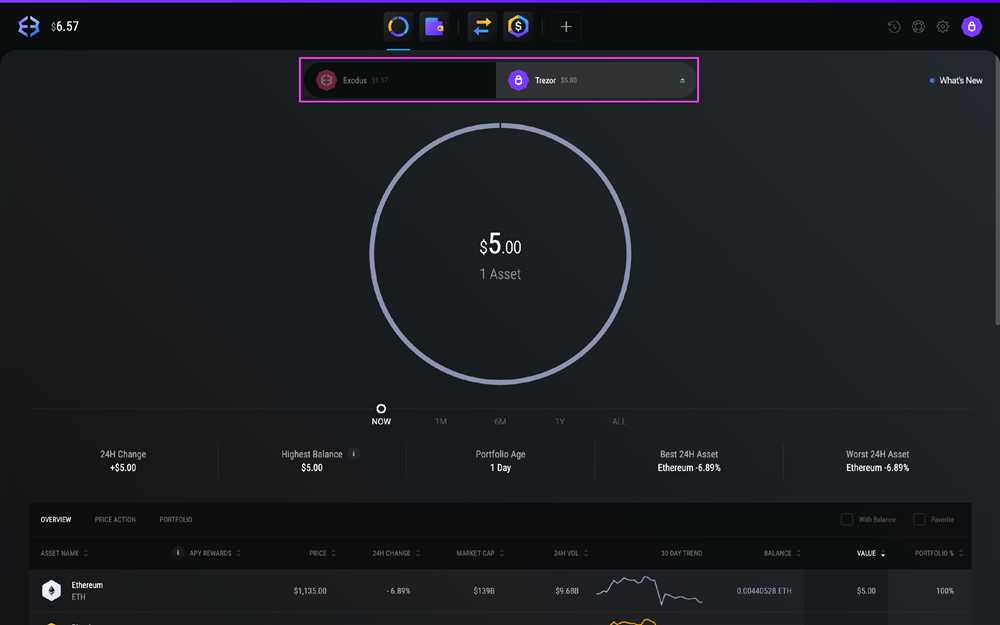
Once Trezor Bridge is installed, you can access the Trezor Wallet interface. Open your web browser and go to wallet.trezor.io or use the Trezor Wallet application on your computer or mobile device. Connect your Trezor device and follow the on-screen instructions to unlock your wallet.
Step 4: Choosing the Cryptocurrency to Transfer
In the Trezor Wallet interface, you will see a list of supported cryptocurrencies. Choose the cryptocurrency you want to transfer from the available options.
Step 5: Generating a Receiving Address
To transfer your cryptocurrency to the Trezor Wallet, you need to generate a receiving address. Click on the “Receive” tab in the Trezor Wallet interface and follow the instructions to generate a unique address for your chosen cryptocurrency.
Step 6: Initiating the Transfer
Once you have the receiving address, go to the wallet or exchange where your cryptocurrency is currently stored. Initiate a transfer and enter the generated receiving address as the destination for your funds. Follow the instructions provided by the wallet or exchange to complete the transfer.
Step 7: Verifying the Transaction
After initiating the transfer, you can verify the transaction details in the Trezor Wallet interface. Check the amount, fee, and destination address to ensure everything is correct. Confirm the transaction and wait for the blockchain network to confirm and process the transfer.
Step 8: Enjoying the Secure Storage
Congratulations! You have successfully transferred your cryptocurrency to the Trezor Wallet. Your digital assets are now securely stored in your Trezor hardware device, protected from hackers and other online threats. You can rest assured knowing that your crypto is in safe hands.
Note: It is always recommended to double-check the addresses and transaction details before initiating any transfers to prevent any loss of funds.
Start transferring your crypto to the Trezor Wallet today and experience the highest level of security and convenience for your digital assets!
Why Transfer Your Crypto?
Transferring your crypto to the Trezor Wallet provides you with a range of benefits and enhanced security for your digital assets. Here are the key reasons why you should consider transferring your crypto:
1. Increased Security
By transferring your crypto to the Trezor Wallet, you can significantly improve the security of your digital assets. Trezor is a hardware wallet that stores your private keys offline, reducing the risk of online hacks or theft.
2. Peace of Mind
With the Trezor Wallet, you no longer need to worry about the safety of your crypto. Your digital currencies are stored in a secure and offline environment, providing you with peace of mind knowing that your assets are protected.
3. User-Friendly Interface
Trezor Wallet offers a user-friendly interface that makes it easy for anyone to manage and transfer their crypto. Whether you are a beginner or an experienced user, transferring your crypto to the Trezor Wallet is a simple and straightforward process.
4. Compatibility
The Trezor Wallet is compatible with a wide range of cryptocurrencies, allowing you to transfer and manage various digital assets in one secure place. Whether you hold Bitcoin, Ethereum, or other popular cryptocurrencies, Trezor has got you covered.
5. Backup and Recovery Options
With the Trezor Wallet, you have multiple backup and recovery options, ensuring that your crypto is always safe even if your device is lost or damaged. You can easily recover your funds using the recovery seed, providing you with added peace of mind.
| Benefit | Explanation |
|---|---|
| Increased Security | Trezor stores your private keys offline, reducing the risk of theft or hacks. |
| Peace of Mind | With Trezor’s secure storage, you can have peace of mind regarding the safety of your crypto. |
| User-Friendly Interface | The Trezor Wallet is designed to be easy to use for both beginners and experienced users. |
| Compatibility | Trezor supports various cryptocurrencies, allowing you to manage different assets in one place. |
| Backup and Recovery Options | Trezor provides multiple options to backup and recover your funds, ensuring their safety. |
Overview of Trezor Wallet

The Trezor Wallet is a highly secure and user-friendly cryptocurrency wallet that allows you to store, manage, and transfer your digital assets with ease. Designed with the utmost security in mind, the Trezor Wallet ensures that your funds are protected from unauthorized access and potential security threats.
With the Trezor Wallet, you have full control over your private keys, which are securely stored offline in the device itself. This means that even if your computer or smartphone is compromised, your funds remain safe and secure.
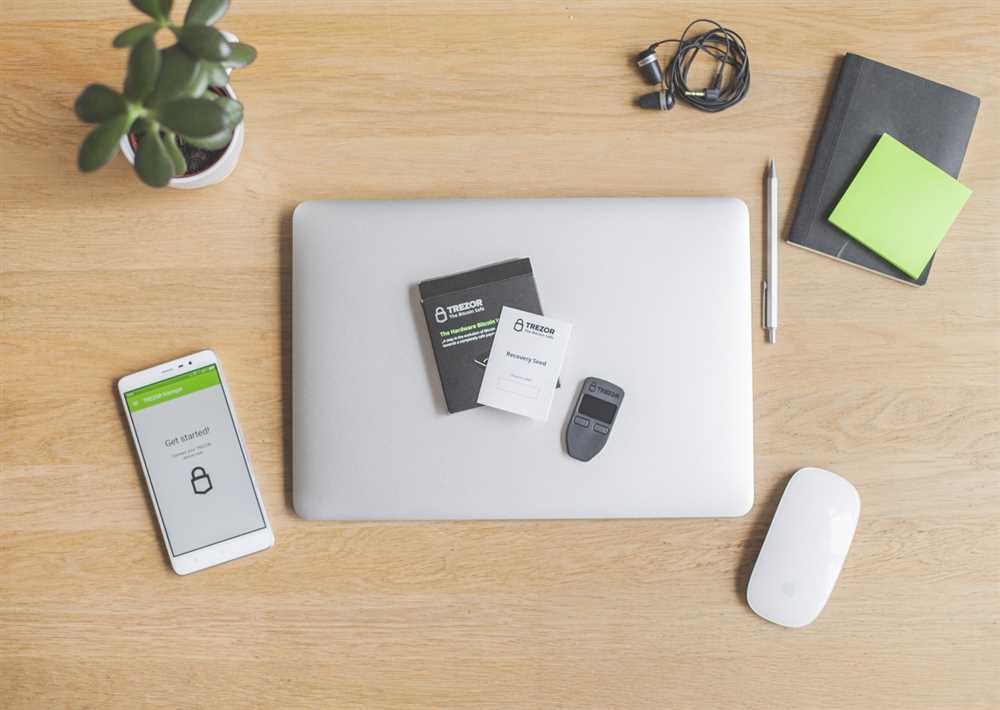
One of the key features of the Trezor Wallet is its easy setup process. Simply connect the device to your computer or smartphone using the USB cable provided, follow the step-by-step instructions, and you’re ready to go. The intuitive interface makes it simple for even beginners to use and navigate.
In addition to its security and user-friendly design, the Trezor Wallet supports a wide range of cryptocurrencies, including Bitcoin, Ethereum, Litecoin, and many more. This makes it a versatile and convenient solution for managing multiple digital assets.
When it comes to transferring your crypto to the Trezor Wallet, the process is straightforward. Simply connect your Trezor device, open the wallet software on your computer or smartphone, and follow the step-by-step guide. The Trezor Wallet provides clear instructions and prompts to help ensure that your funds are transferred securely and accurately.
Overall, the Trezor Wallet offers a secure and user-friendly solution for managing and transferring your crypto. With its strong focus on security and ease of use, it is a popular choice among cryptocurrency enthusiasts and beginners alike.
Step-by-Step Guide
Transferring your crypto to the Trezor Wallet is a simple process that ensures the safety and security of your digital assets. Follow these steps to securely transfer your crypto to your Trezor Wallet:
1. Set Up Your Trezor Wallet
If you haven’t done so already, start by setting up your Trezor Wallet. Connect your Trezor device to your computer and follow the instructions provided by the Trezor setup wizard. Make sure to securely store your recovery seed as it will be essential for accessing your wallet in case of loss or damage to your device.
2. Access your Cryptocurrency Exchange Account
Login to your cryptocurrency exchange account where your crypto is currently stored. Navigate to the wallet section of your account where you can see the funds you want to transfer.
3. Choose the Cryptocurrency to Transfer
Select the specific cryptocurrency you want to transfer to your Trezor Wallet. Double-check that you have selected the correct cryptocurrency to avoid any mistakes in the transfer process.
4. Generate a Receiving Address
In your Trezor Wallet, navigate to the specific cryptocurrency you want to transfer. Click on the “Receive” button to generate a receiving address. Copy the address or use the QR code provided.
5. Initiate the Transfer
Go back to your cryptocurrency exchange account and find the option to send funds. Paste the receiving address into the recipient field and enter the amount you want to transfer. Verify all the details are correct before confirming the transfer.
6. Confirm the Transaction
Once you have reviewed all the transfer details, confirm the transaction. Depending on the cryptocurrency and the network congestion, the transfer may take some time to complete. You can track the progress of your transfer using the transaction hash provided by the exchange.
7. Verify the Transfer
After the transfer is confirmed, you can verify that the funds have been successfully transferred to your Trezor Wallet. Check the balance of your Trezor Wallet for the corresponding cryptocurrency to ensure the transfer was successful.
Following these step-by-step instructions will help you safely transfer your crypto to your Trezor Wallet, giving you peace of mind knowing that your digital assets are secure.
Q&A:
What is this product about?
This product is a step-by-step guide that helps you transfer your cryptocurrency to the Trezor Wallet. It provides clear instructions on how to securely move your digital assets to the Trezor hardware wallet.
Why should I transfer my crypto to the Trezor Wallet?
The Trezor wallet is one of the most secure hardware wallets available. By transferring your crypto to the Trezor wallet, you can ensure that your digital assets are safely stored offline and protected from potential hacks or theft.
Is this guide suitable for beginners?
Yes, this guide is designed to be beginner-friendly. It provides step-by-step instructions with screenshots and explanations to help even those who are new to cryptocurrency easily transfer their funds to the Trezor Wallet.
Can I use this guide for any type of cryptocurrency?
Yes, this guide can be used for transferring any type of cryptocurrency that is supported by the Trezor Wallet. It covers the general process of transferring crypto and provides specific instructions for popular cryptocurrencies such as Bitcoin, Ethereum, and Litecoin.