A Comprehensive Guide on Using the Trezor Wallet for Transferring and Receiving Cryptocurrency
Cryptocurrency has revolutionized the way we transact and store value online. With its decentralized nature and secure encryption, it has become a popular choice for many individuals and businesses around the world. However, ensuring the safety and security of your digital assets is of utmost importance.
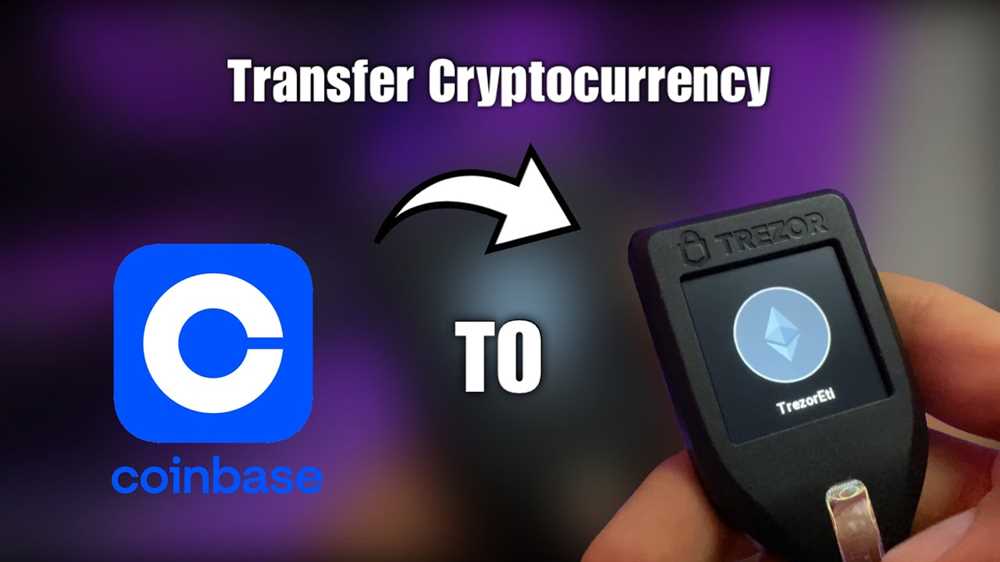
One popular and trusted solution for securely storing and managing your cryptocurrency is the Trezor Wallet. Trezor is a hardware wallet that provides an offline storage solution for your private keys, protecting you from online threats such as hacks and phishing attacks. In this article, we will guide you on how to transfer and receive cryptocurrency using the Trezor Wallet.
To get started, you will need to have a Trezor Wallet and set it up. Once you have set up your wallet, you can connect it to your computer or mobile device using a USB cable. The Trezor Wallet interface will guide you through the necessary steps to create a new wallet or import an existing one.
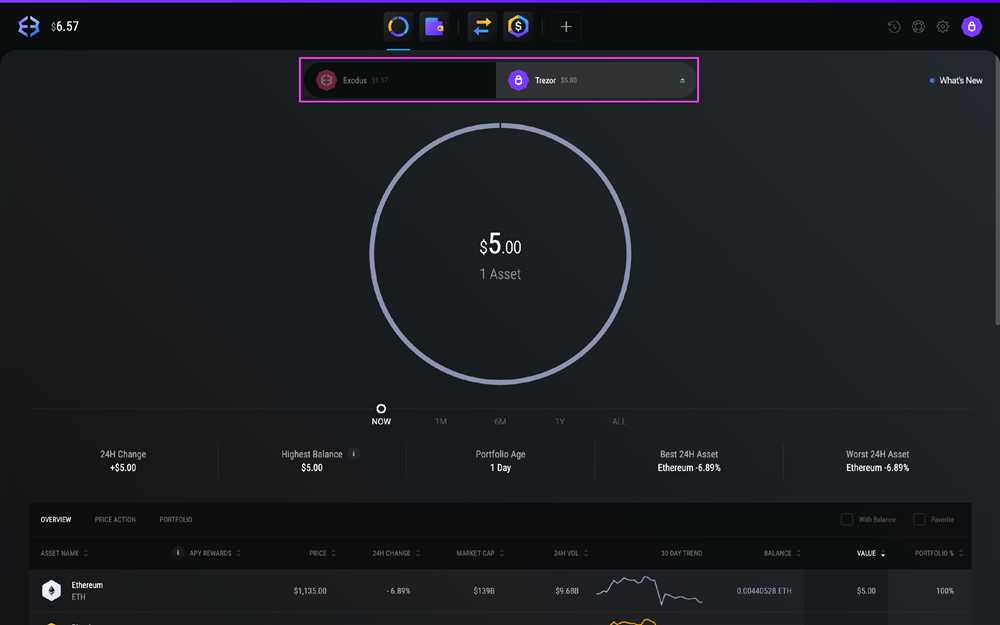
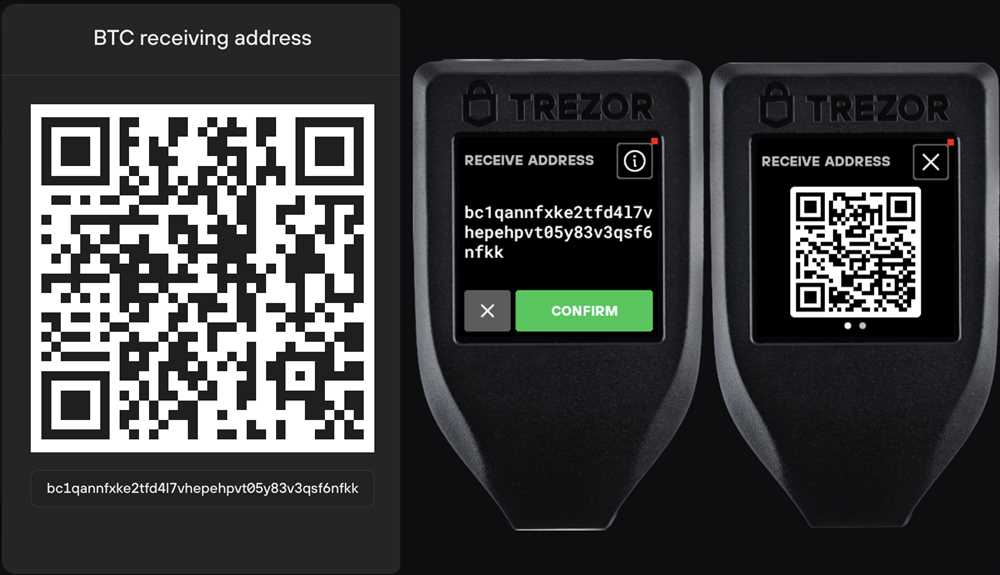
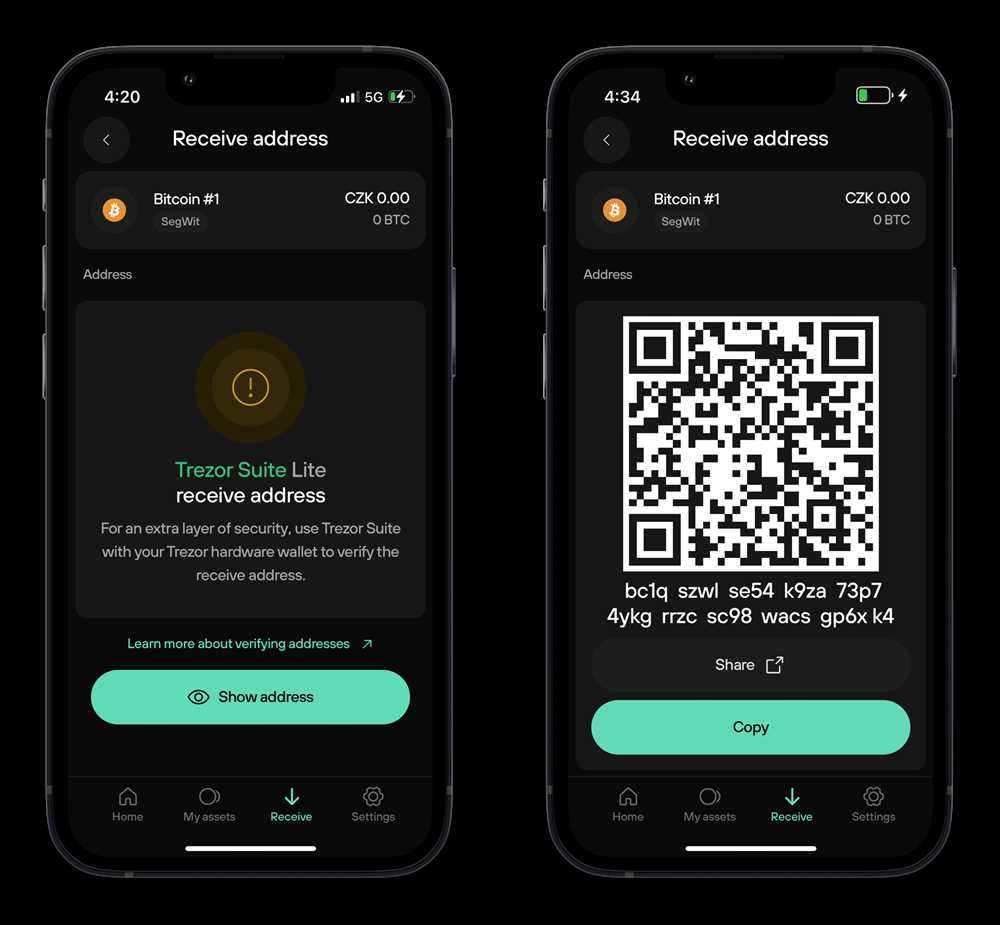
Once your wallet is set up, you can start transferring cryptocurrency to it. To do this, you will need the public address of your Trezor Wallet. This address is like your bank account number and is used to receive funds. You can find your public address by navigating to the “Receive” tab in your Trezor Wallet interface.
How to Transfer Cryptocurrency with Trezor Wallet
If you own a Trezor Wallet and want to transfer cryptocurrency to another wallet or exchange, the process is quick and simple. Follow these steps to transfer your cryptocurrency with Trezor Wallet:
- Connect your Trezor device to your computer and open the Trezor Wallet.
- Enter your PIN and passphrase (if applicable) on your Trezor device.
- In the Trezor Wallet interface, select the cryptocurrency you want to transfer from the list of available options.
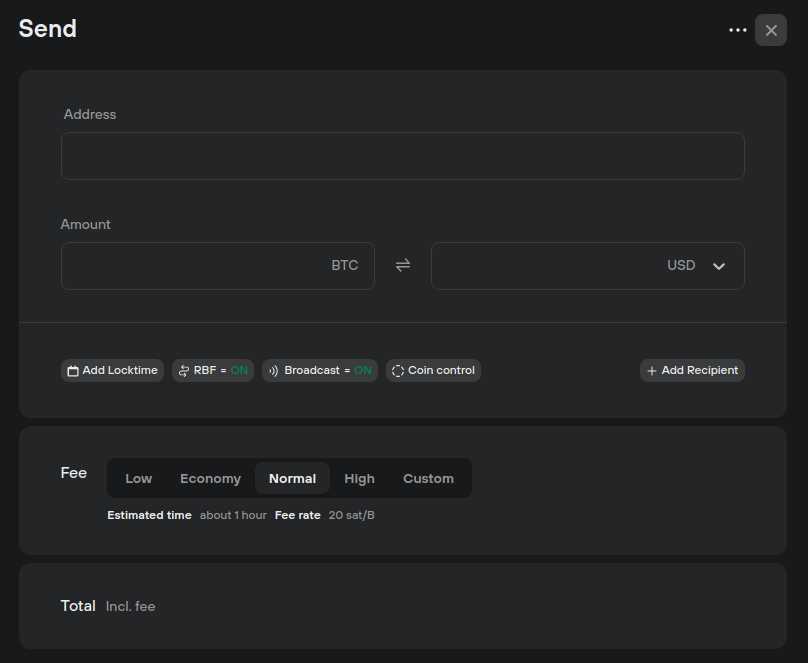
- Click on the “Send” button to initiate the transfer.
- Enter the recipient’s wallet address in the “To” field. Make sure to double-check the address to prevent any mistakes.
- Specify the amount of cryptocurrency you want to send in the “Amount” field. You can use the available options or manually enter the desired amount.
- Review the transaction details to ensure everything is correct.
- Click on the “Send” button to confirm the transaction.
- Verify the details once again on your Trezor device and confirm the transfer.
- Wait for the transaction to be confirmed on the blockchain, which may take some time depending on the network congestion and the cryptocurrency you are using.
- Once the transaction is confirmed, you can check the status of your transfer on the blockchain explorer using the provided transaction ID.
It is important to note that the steps above may vary slightly depending on the version of Trezor Wallet you are using. Always make sure to carefully follow the instructions provided by the wallet software and double-check the recipient’s wallet address to avoid any potential loss of funds.
Step 1: Setting Up Your Trezor Wallet
Before you can start transferring and receiving cryptocurrency with your Trezor Wallet, you will need to set it up first. Here is a step-by-step guide on how to set up your Trezor Wallet:
- Connect your Trezor device to your computer using the USB cable provided.
- Go to the Trezor Wallet website and click on “Get Started” to initiate the setup process.
- Follow the on-screen instructions to install the Trezor Bridge, which allows communication between your Trezor device and the wallet interface.
- Once the Trezor Bridge is installed, you will be prompted to click on “Continue” to move forward.
- Choose a PIN for your device. Make sure it is a secure PIN that you can remember easily but others cannot guess.
- The Trezor Wallet will then generate a recovery seed, which is a list of 24 words. Make sure to write down this seed and keep it in a safe place. This seed can be used to recover your wallet in case your device is lost or damaged.
- Confirm your recovery seed by rearranging the words in the correct order. This step ensures that you have written down the seed correctly.
- Create a strong password for your wallet. This password adds an extra layer of security to your wallet.
- Once you have set up your PIN, recovery seed, and password, your Trezor Wallet is now ready to use.
By following these steps, you have successfully set up your Trezor Wallet and are ready to start transferring and receiving cryptocurrency. Make sure to keep your recovery seed and password safe, as they are essential for accessing and recovering your wallet.
Step 2: Connect Your Trezor Wallet to Your Computer
Connecting your Trezor wallet to your computer is the next step in the process of transferring and receiving cryptocurrency. Follow the instructions below to ensure a successful connection:
1. Plug in your Trezor wallet
Using the USB cable that came with your Trezor wallet, plug it into a USB port on your computer. Make sure the cable is securely connected to both your wallet and the computer.
2. Install the Trezor Bridge
In order for your computer to recognize your Trezor wallet, you need to install the Trezor Bridge software.
- Open your web browser and go to the official Trezor website.
- Look for the “Downloads” section and find the Trezor Bridge software.
- Download and install the software according to the instructions provided on the website.
3. Launch the Trezor Wallet
Once the Trezor Bridge software is installed, you can launch the Trezor Wallet.
- Open your web browser and go to the Trezor Wallet website.
- Click on the “Connect Trezor” button.
A pop-up window will appear asking you to confirm the connection to your Trezor wallet. Click on the “Connect” button to proceed.
4. Unlock your Trezor wallet
Follow the on-screen instructions on your Trezor wallet’s screen to unlock it. This usually involves entering your PIN code or verifying your fingerprint.
Once your Trezor wallet is successfully connected and unlocked, you are ready to proceed with transferring or receiving cryptocurrency using your Trezor Wallet.
It is important to keep your Trezor wallet and computer secure while connected. Avoid using public or unsecured Wi-Fi networks, and always double-check the URLs and websites you are accessing to ensure you are on the official Trezor website.
| Troubleshooting Tip: |
|---|
| If you encounter any issues during the connection process, try restarting your computer and reconnecting your Trezor wallet. If the problem persists, consult the official Trezor support resources for further assistance. |
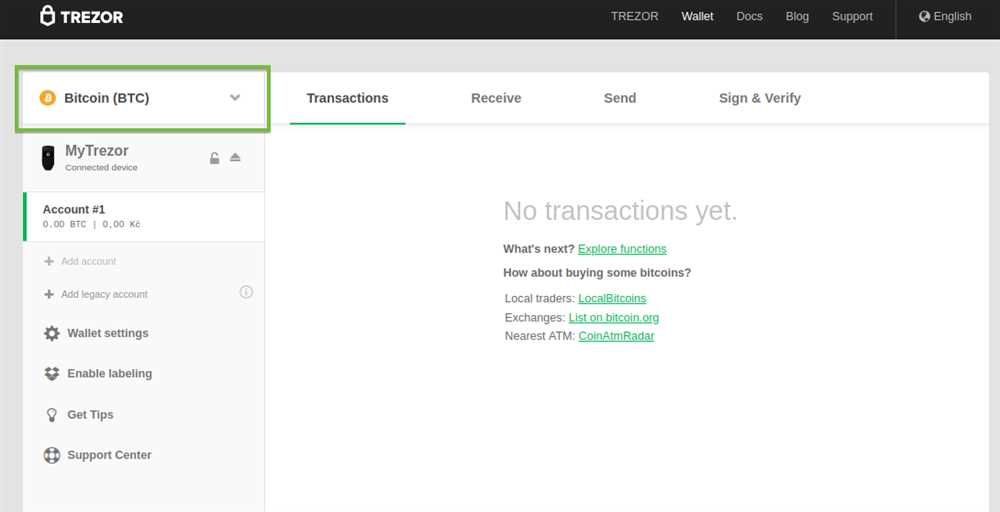
Step 3: Select the Cryptocurrency to Transfer
Once you have accessed your Trezor wallet, you need to select the cryptocurrency that you want to transfer. Trezor wallet supports a wide range of cryptocurrencies, including Bitcoin (BTC), Ethereum (ETH), Ripple (XRP), and many others.
To select the cryptocurrency, follow these steps:
Step 1: Navigate to the Wallet
On your Trezor device, use the buttons to navigate to the wallet section. This is typically labeled as “Wallet” or can be represented by a wallet icon.
Step 2: Find the Cryptocurrency
Once you are in the wallet section, scroll through the list of available cryptocurrencies. You can use the buttons on your Trezor to scroll up and down the list.
If you know the specific cryptocurrency you want to transfer, you can use the search function on the Trezor device to quickly find it.
Step 3: Select the Cryptocurrency
When you locate the desired cryptocurrency, press the button on your Trezor to select it. This will open the wallet for that particular cryptocurrency on your device.
It is important to ensure that you have selected the correct cryptocurrency before proceeding with the transfer. Sending a cryptocurrency to the wrong wallet may result in permanent loss of funds.
Once you have selected the cryptocurrency, you are ready to proceed with the transfer. Follow the instructions provided by the Trezor wallet to complete the transfer process.
Q&A:
Is it safe to transfer and receive cryptocurrency with Trezor Wallet?
Yes, it is safe to transfer and receive cryptocurrency with Trezor Wallet. Trezor Wallet is a hardware wallet that stores your private keys offline on the device, ensuring the highest level of security for your crypto assets. When you initiate a transaction, the transaction details are securely displayed on the Trezor device, and you need to physically confirm the transaction by pressing the button on the device. This protects your funds from being accessed by hackers or malware. Additionally, Trezor Wallet uses industry-standard encryption to protect your data and employs various security measures to prevent unauthorized access.